
Was there any day more exciting in primary school than lunch order day? Everyone would turn up in the morning with their order scrawled on a brown paper bag, the couple of coins required to pay for it taped to the front. And if you were the chosen one that week you would get to be the hero who carried the shopping basket full of your classmates brown paper dreams down to the canteen. Later in the day you’d carry those same bags back packed to the brim with everyone’s favourite steaming hot junk food. Meat pies, chicken nuggets and sausage rolls were always common picks. But another one of my favourites was the good old pizza pocket. What was yours?

The thing about childhood memories is that they glisten so wonderfully in our minds, but attempts to relive them as adults usually end in disappointment. Every time we’ve bought pizza pockets as an adult it’s usually followed by a, “These used to be so much nicer,” comment. More likely, they were never quite amazing but we were much more easily impressed as children. So when the pizza pocket craving hit recently rather than re-living that disappointment again I decided to make my own!
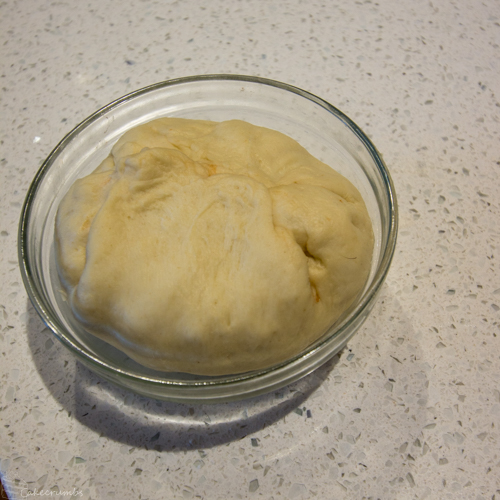
The first step naturally has to be making the pizza dough. If you have a favourite recipe you can definitely stick to that. This one is a very basic and simple dough. The most important step of course is proofing the yeast. Most dried yeasts are fine added straight to the flour mixture, bit I wanna know its alive before I go to all that effort.


This year I finally bought myself a stand mixer and I love how much hands on time this guy saves me. I let the mixer bring the dough together and do the initial kneading, but I still prefer to knead by hand towards the end. You feel when the dough becomes the right consistency and elasticity. After leaving it to rise for an hour you should end up with a beautiful bowl of dough.


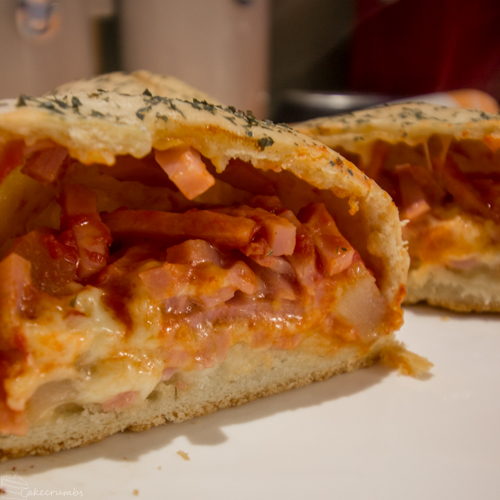
While that’s happening you’ll want to grab your favourite pizza ingredients. My go-to order was always a hawiian pizza pocket so I had to make some. I divided the dough into 6 and roughly rolled them out.


It’s not strictly necessary to do so, but I used a small bowl to form the pizza pockets. It gives me a really good idea of exactly how much filling I’m gonna get in there before attempting to close it over. Then I smother it all with a good layer of tomato paste.


Half of the pizza pockets I filled with those old-fashioned Hawaiian pizza toppings. The other three I filled with the ham, olives, capsicum and haloumi. There’s no rules here. If you like it on your pizza, shove it in your pizza pocket!


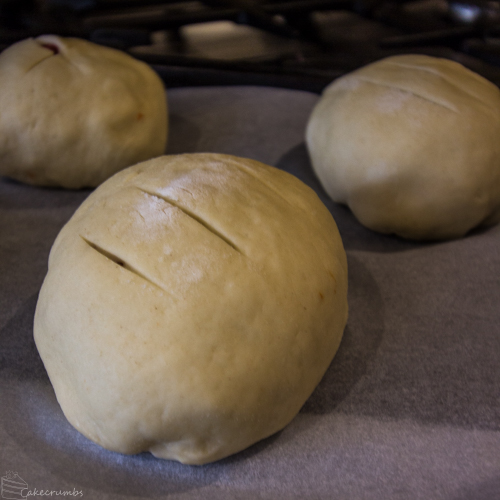
Once they’re filled you can stretch and pinch the edges of your dough together.
I placed them seam-side down onto a baking tray and scored the dough. If you’re making a few different flavours (and especially if it matters to the people eating them) its a good idea here to score them with different patterns so you can tell them apart.
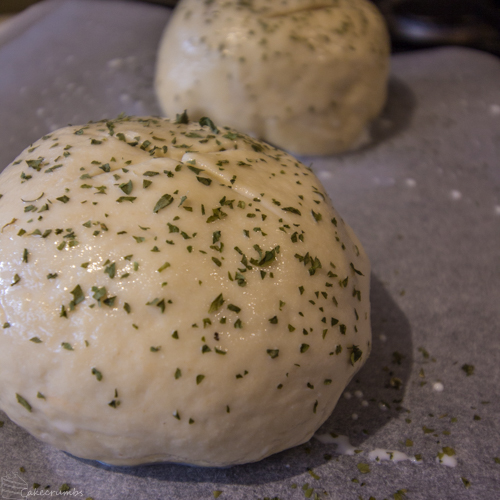
A little milk wash and a sprinkle of parsley give these guys a splash of colour.
A short time in the oven and the smell of pizza dough will be wafting through the kitchen.
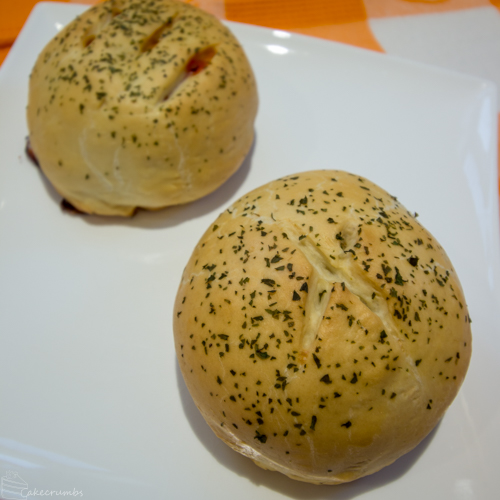
Instead of the mouthful of chewy dough and scant ingredients the commercial products leave me with, I ended up with a crispy, fresh pizza pocket much closer to my rose-coloured childhood memories.
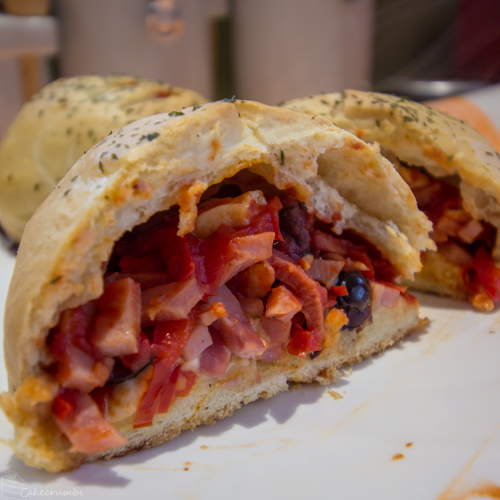
Hawaiian is still my favourite though. By the time all the cheese melted through the pizza pocket it wasn’t as stuffed as the others so maybe next time I’ll see if I can squeeze in more. But damn I love the sweetness of the pineapple and no one will convince me pineapple isn’t godly on pizza.
Lets get you started on your very own!
Homemade Pizza Pockets
A recipe for anyone who ever thought, 'Hmm, yes this pizza is nice but what if I could smush it into a ball instead?'
Ingredients
- 7g (1 sachet) dried yeast
- 3/4 cup (180ml) warm water
- 1/4 teaspoon salt
- 1 tsp caster sugar
- 50ml olive oil
- 2 cups (300g) plain flour
- tomato paste or pizza sauce
- milk for milk wash
- favourite pizza toppings
Directions
- Proof the yeast by adding it to the warm water along with the salt and sugar. Ensure the water is not too hot or you may shock the yeast (test it against your wrist for a comfortable temperature). Cover with a tea towel and allow to sit for 5 minutes. If mixture foams, the yeast is alive and well and ready for the next step.
- Add the flour to a medium sized bowl; make a well in the centre. Add yeast mixture and olive oil; stir to combine.
- Turn dough onto a lightly floured surface and knead for about 8 minutes, or until dough is elastic and smooth to the touch. Place in a lightly greased bowl and cover with a tea towel; allow to sit for half an hour, or until dough has doubled in size.
- Preheat oven to 220°C (200°C fan-forced/440°F). Line a baking tray with greaseproof paper.
- Punch down dough and knead for 1 minute. Divide dough into 6 portions.
- Roll out each portion into a rough circle. You may want to use a small bowl to help form your pizza pockets. In the centre of the dough place roughly 1/2 a cup of your favourite pizza fillings. Its a good idea to alternate the ingredients, especially if you’re using cheese, to get the flavours mixed right through.
- Pinch the edged of the dough together to close it over. If the dough does not stick to itself you can use a little water the moisten it.
- Place the pizza pockets, seam down, onto a baking tray. Score the top of the pizza pocket with a sharp knife. Brush with milk wash. If you have fresh or dried herbs on hand you can sprinkle them over the top. Parsley, rosemary or oregano make for good options.
- Bake the pizza pockets for 20 minutes, or until dough is golden brown. Pizza pockets can be frozen and rewarmed later in the oven if you want to make bigger batches for future.


These were great! Look forward to trying these again with some other flavour combinations.
♥
I’ve never heard of pizza pockets before, but these look amazing!
And I tried them yesterday. They were delicious, almost like they had more flavour than the regular pizza even though they shared the same dough and filling.
I will definitely make them again!
I am so very glad to hear it!