
I’ve been baking a lot of things that needed egg yolks lately, so to use up all the leftover egg whites I’ve been on a macaron baking spree. I’ve been having a play with sizes and flavours and have baked so many macs I don’t even need to look at a recipe any more. This week I decided to have a little fun with the look of the macarons.

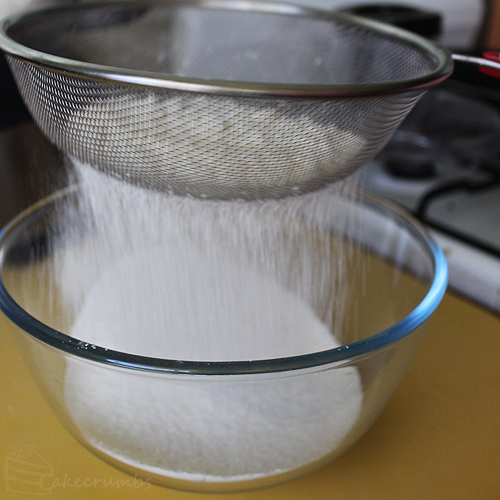
Macarons strike fear into the heart of many, but they’re not especially difficult if you treat it with care. The first step is to get all the lumps out of your almond meal mixture. I always begin by processing the almonds and sugar in a food processor, then sieve it thrice. Once through a large-ish sieve, then twice through a finer sieve. This helps keep the surface lovely and smooth.
The most important part is getting your meringue right. It’s not especially difficult. The main thing is to use squeaky clean and grease-free bowls and utensils.
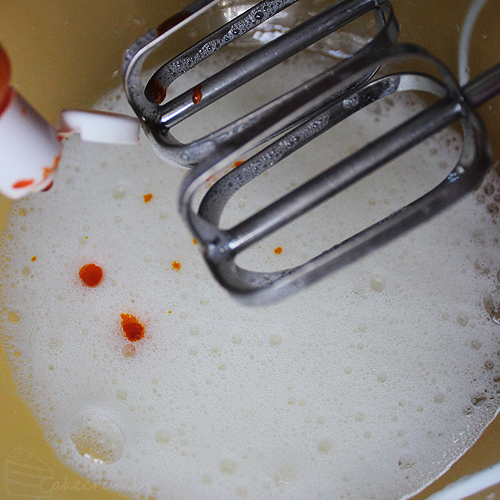
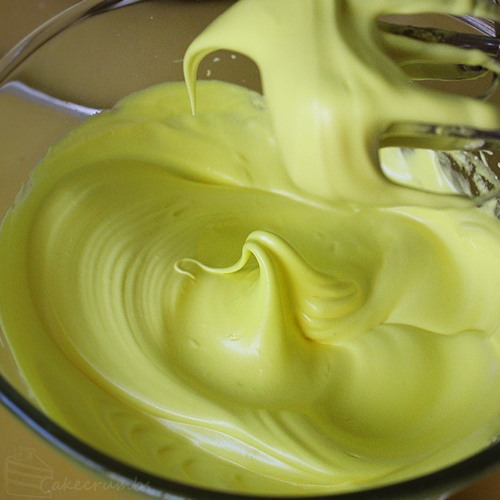
When colouring the batter, you want to start by beating the mixture until it is frothy, then add the colouring. Only use gel paste or powdered food colouring. And liquid colouring will make the batter too runny and cause problems down the track.
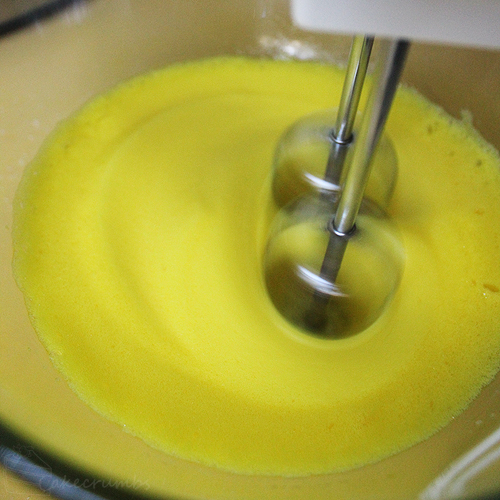
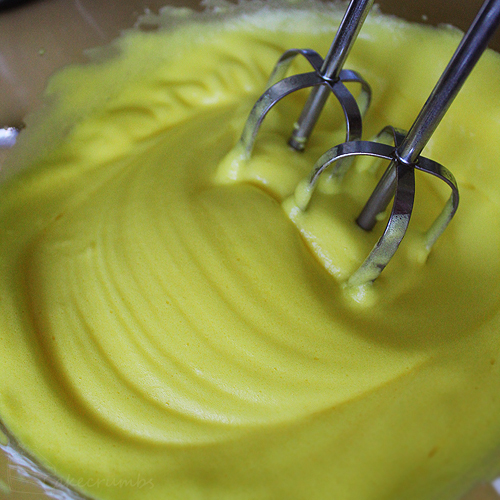
Then it’s a matter of getting it to a perfect stiff peak. You’ll notice ribbons begin to form in the egg whites, which happens at around soft peak stage. This is a sign you’re not that far away. When this mixture is whipped enough that it will stand up to a peak on its own when the beaters are lifted, you’re ready to go.
Now it’s time to add the almond meal to the meringue. Never the other way around. Gradually fold it in until all the mixture is combined.

Then begins the process called macronage. This involves swiping the mixture against the side of the bowl to deflate it. When you first begin you’ll notice the mixture is really airy and will adhere to the sides of the bowl. But as you continue the mixture gets thinner and will start to run down the sides of the bowl.

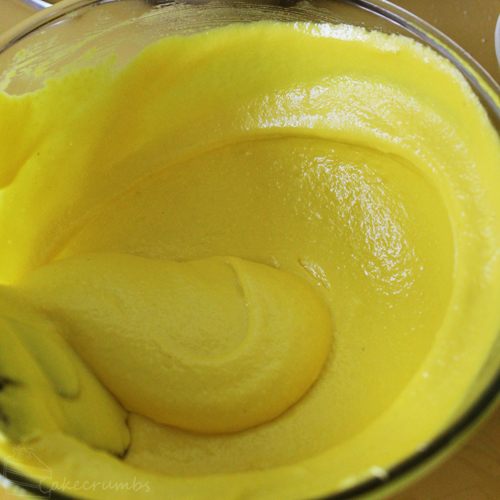
When you notice this begin to happen, you can test your batter. You can either dollop a little on a plate, or just drop some mixture back into your bowl. The peak should disappear between 10-20 seconds. If it doesn’t, keep swiping and testing until it does. As soon as it’s deflated enough, stop and put it in a piping bag.

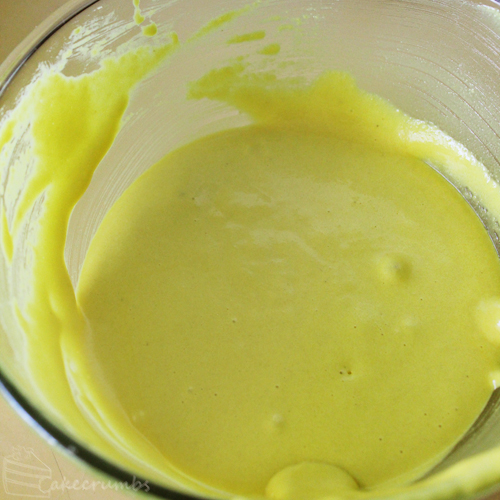
When it’s at this consistency the macarons will pipe smoothly and the peaks will disappear into itself, but it won’t run all over the place.

To make the stripes on the bees I created a little template of 1/4 inch stripes from a spare piece of acetate I had. I waited until the macarons had dried and formed a skin over the top, then sprinkled some dutch processed cocoa into it.

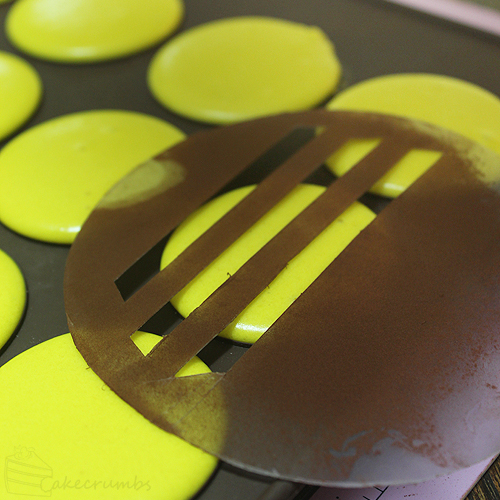
This process is fiddly and it is messy. If you’re after a quicker solution, you can always pipe some dark chocolate or use edible ink to create the stripes on the macs after they’ve baked.

While the macs are doing their thing, you can get started on the filling. I couldn’t make MacBees without making honeycomb. Home made honeycomb is quick, simple and easy. And, like most things made at home, it’s just so much more rewarding in taste. All it involves is boiling a sugar and honey syrup, adding some bicarb and voila!


It takes about 20 minutes to cool and it’s imperative you don’t disturb it during this time. Give it plenty of time to do it’s thing, then try not to eat it all before it ends up in your macs.
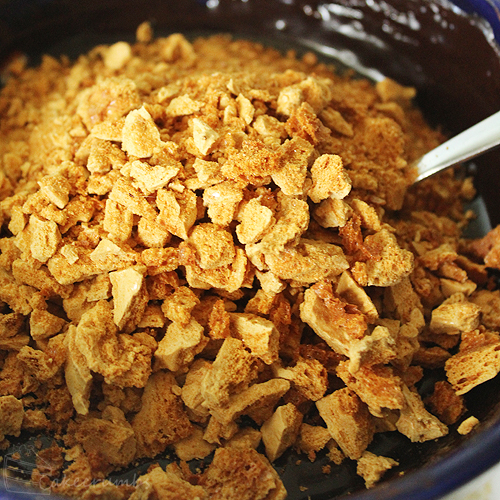
I had high hopes of having beautiful little rounds of honeycomb in the middle of the macarons, but cutting it to size was just not going to happen. Honeycomb snaps and breaks every which way it wants to, so I decided to find another way to use it. I took about half of it, crushed it up and added it to my ganache. If you want the honeycomb pieces to stay firm and crunchy, you’ll need to coat them in chocolate or fat first. But I wanted to let the honeycomb flavour go through the ganache and see what happened.

When the macs are baked and cooled, you can add little features to them. I used a little stiff peak royal icing and piped eyes, then use black food colouring to dot on the pupils. If you don’t want to whip up or buy a batch of icing for the purpose, you can use small round pearls or candies, or just melt a little white chocolate for the job.


Soon enough you’ll have your own little hive of honey bees.
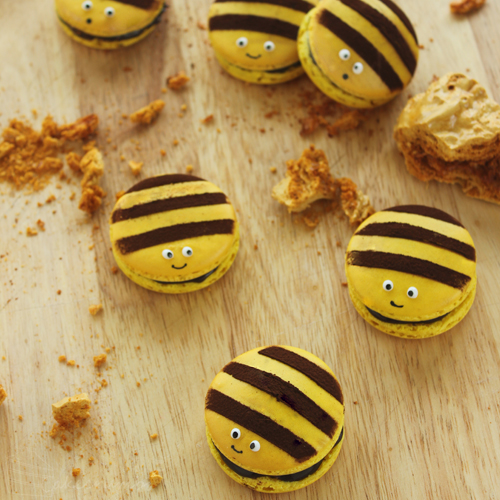
Don’t be put off by their little smiles, they’re totally delicious and are begging to be consumed.

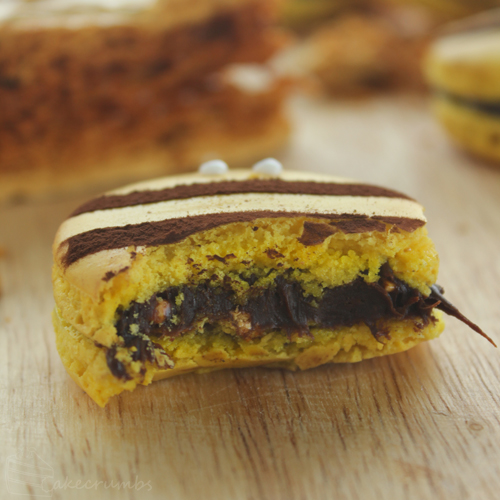
I was completely making things up as I went with these, so I’m thrilled by the result. But I’m especially thrilled by the ganache. The honeycomb gives such an incredible dynamic to it. It lends it’s own sweet and bitter flavour to the ganache while making it chewy but filled with specks of crunchy honeycomb. It complements the crunchy and chewy texture of the macaron really well and is definitely my most favourite macaron yet.
Here’s how to bake your hive of macs.
| Honey Bee Macarons |
| Ingredients |
| Macaron biscuit
125g almond meal 150g pure icing sugar 100g egg whites (approx 3 eggs) aged 1-7 days 65g caster sugar Yellow gel paste and powdered food colouring Dutch processed cocoa, for dusting 1tbsp stiff peak royal icing, or other icing to decorate Honeycomb 100g caster sugar 1 tbsp (20ml) honey 1 tbsp (20ml) golden syrup 3 tsp bicarbonate soda Chocolate ganache 150g dark chocolate, chopped 75ml cream |
| Method |
Macaron biscuit
Honeycomb
Chocolate Ganache
To assemble, spoon (or pipe with a large nozzle) the honeycomb ganache onto the macaron halves without the stripes. Sandwich with the striped halves. Macs are best after a day in the fridge but can be eaten immediately.
|


aww these are so cute! I love the surprised looking ones! You are such a Macaron Goddess! 🙂
I’ve actually never heard of a way to make honeycomb at home and I am definitely gonna try it! Did you use just half of the honeycomb for the ganache or all of it? Because you mentioned using half of it in your post, but in the recipe instructions you did not mention it any more? Thanks in advance for your answer! 🙂
Thank you! I certainly have lots to learn about the fragile mac, but I’m getting there!
I’m totally confusing – I used half of the amount I made, but by the time I got down to writing the recipe I figured I should just halve my recipe rather than giving the full one and leaving people with half a batch extra. Especially because it doesn’t keep very well so it either needs to be coated in chocolate or something or used up within a day or so. So the recipe provided is enough for the ganache, but feel free to double it if you want extra!
Becoming a big fan of your blog 🙂 For now, I am just salivating over your beautiful culinary art but soon will try to enter the dance too 🙂
Thank you for your kind words! I should warn you that when you start the dance you’ll find it hard to ever stop dancing. 😉
Wow I love them! 😀 I think the idea is very original and they look super cute 😀
Those are just TOO CUTE!!!! My father in law just fixed my stand mixer and I need to make some of those for my kids. Must!
Oh wonderful. I might have to pop over and borrow your stand mixer!
Morning tea at my place, please!
Sounds like a plan!
Pingback: Bumble Bee Macarons | Sugar Monster
These bee macarons look really cute! Have been some time I tried baking macarons… I think I should try baking some soon!
Thank you!
I couldn’t resist passing this along on my bubblews page: http://www.bubblews.com/news/943386-honey-bee-macarons-life-is-so-sweet
Thank you for sharing. :]
So I’ve had issues with macaroons before but I tried this recipe and they turned out amazingly! So tasty I’m sure they won’t be lasting long, thank you!
Yay! I’m so glad you were able to reach macaron success!
Pingback: Macaroon masterclass-shortened | A Bakers Diet
These are one of my favourite macacrons you’ve made so far, flavour-wise. Very inventive and they looked great.
Definitely the best filling!
Squee! Their little faces are just gorgeous, and I love the idea of a honeycomb ganache. Just gorgeous!
Thanks so much!
Pingback: Swoon Over Super Cute Macarons with a Twist - Tiny Hands Blog - Tiny Hands Blog
Pingback: out of practice | The Dropped Baton
Pingback: Christmas Macarons | Cakecrumbs
Pingback: Lady From USA
Pingback: 10 Decorative Macaron Ideas | Edible Crafts | CraftGossip.com
Pingback: Easter Egg Macarons | Cakecrumbs
they are so cute, and sound delicious, I have been wanting to try making macarons now I definitely have to.
thanks for the post!
Pingback: Vegan macaron attempt – Blue Blossoms Baking
Pingback: cakecrumbs.me/…… – Your Family Will LOVE These Cakes!