
It's that time of year again where you can barely take a step outside the house without seeing chocolate eggs beckoning from every corner. It's also that time of year where warnings about products that contain not-so-animal-friendly ingredients flood the news feed of every social networking site, advising you who to support and who to boycott. Or maybe that's just because half my friends are Zoologists? Either way, it can be daunting trying to remember who and what is safe to buy from. I find such an appeal in making my own Easter eggs. Knowing exactly what's going into them and knowing that they're definitely palm oil free is a big plus for me.

But the best part is they're so fun and easy to make. You get to pick your own designs, colours, flavours and fillings. The only limit is your imagination.
If you've never made chocolate eggs before, here's a basic tutorial to get you started. After this, you can let the creative juices flow and add your own twist to it!
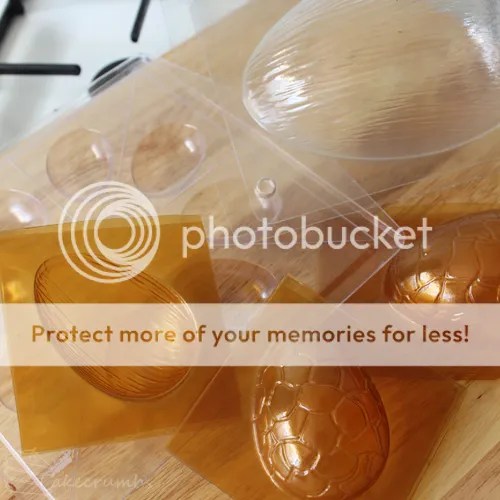
First off, you'll need some egg shaped moulds. There's a tonne of varieties on the market, from silicone to stiff plastic. Most of my collection are those I inherited from Cameron's mum when she decided she didn't want them any more. When I buy moulds, I tend to go for the cheapest plastic ones. You don't need fancy equipment for this as the chocolate is not hard to remove from a stiff mould if you do it right. And it's ever so easy to do it right.
How many eggs you want to make will determine how much melted chocolate you use. Always over-estimate. It's best if you temper your chocolate, but I'm going to write this tutorial assuming you've only melted your chocolate.
Next, you'll want to choose your design. Keeping it basic this time, I went for simple white chocolate patterns on the eggs. You can get some really interesting patterns by using a paint brush (make sure you keep any brushes you use for food separate from any you might use for painting).

Or you can also drizzle some chocolate inside the mould for some more defined patterns.

There's a few ways of making hollow chocolates and none are necessarily 'right'. You might even develop your own way, but this is how I find to be most effective for me. For moulds that aren't singular, like the one below, I fill it completely with the melted chocolate. This is good for keeping patterns in tact. Brushing or pushing it around the mould might shift your other colour chocolate. Make sure you fill it right to the top. Even slightly over fill it.

Leave it to sit for a moment. Soon you will notice the chocolate begin to dull around the edges as it cools. When you see this, place a piece of baking paper on your bench and turn the mould upside down. Give it a shake to encourage the chocolate to drip out. You want about half of it to leave.

Then place the mould on top of a clean sheet of baking paper upside down and let it firm up.

The second way of doing this is the method I use for individual moulds. Scoop a large quantity of chocolate into the mould and tilt the mould to encourage the chocolate to cover it entirely. If you find you've added too much chocolate, you can tip some of it back into your bowl after all the sides are covered.

Once that's done, similarly allow it to set inverted on a piece of baking paper.

Once set, use a sharp knife to clean up any excess.

By inverting the moulds and tidying it up after, you get this neat little lip around the inside of the chocolates. This makes it easier to join the two halves later. Now, if you did temper your chocolate, the chocolates will be completely hard and will pop right out of the mould now. But if you've just melted the chocolate, stick it in the freezer for about 10 minutes. This will make the chocolate a cinch to remove. They'll practically fall out of the moulds, if not a few taps will do the trick. Turn them out onto paper towel or a tea towel and let them sit for a moment to let them get rid of some of the moisture they picked up in the freezer.
Don't put the chocolates in the fridge. They'll become dull, spotty and streaky and still won't fall out of the mould. Fridge + chocolate making is a total no-no in my books.

This is the part where I'd normally add any fillings I'd made. This time, however, I put smaller eggs inside the eggs.
Eggception.

Use the brush or a spoon (or even a piping bag) to add a little melted chocolate around the lip of the egg half. While you join the eggs, you're going to want to avoid touching them as much as possible. It's best to handle them either wearing gloves or by using a sheet of baking paper. Otherwise you get fingerprints and dull marks all over the eggs. If you're making these on a hot day, like I was, they'll melt twice as fast if you use your hands.

Join the two halves together and press down firmly.

We still have a little of a visible seam, so if it bothers you we can clean it up really easily. I use a butter knife and sort of pushing/dragging motion to rid the excess. It was hard to photograph exactly what this looks like (I swear I need about 6 pears of hands), but the motion is not dissimilar from spreading a thin layer of butter onto bread. If you go over it a few times, the seam will all but disappear.

And that's it! In no time you'll be greeted with a clutch of unique eggs to lavish upon your loved ones.
Or nom them yourself. Go on. You deserve it.

If you plan on giving them away, you can always cover them with some coloured foil to make them eatra-Eastery.


My pleasure! ♥
Those look awesome! I love the eggception 🙂
Where I live it’s probably even hotter than Melbourne, so making chocolates is generally a no go. *I* melt whenever in the kitchen, imagine chocolates… Would love to try this out anyway. Someday…
(Sorry for going anon, unable to log in at the mo)
Pingback: Metallic Chocolate Tutorial | Cakecrumbs