
It’s been quite a long time since I’ve played around with a joconde. I have a terrible habit of getting stuck on one idea: I’ll bake almost nothing but that for weeks, and then forget it ever existed for a year. So when my birthday rolled around and I had the opportunity to make whatever I wanted with no restrictions, I decided it was time to return to this awesome cakey medium.

So far I’ve mostly used decorating combs for making patterns in the joconde paste. I’ve been wanting to use the sponge as more of a canvas for unusual designs. You always see them with uniform designs on the sides, but I wanted something a bit more picturesque. I had a number of food stencils, but all were a bit bland for what I was thinking. I hit up my favourite cake decorating store and started rummaging through the stencils until I finally found something that was more ‘me’.
The last and only other time I used a stencil for the decor paste I had a white background. I didn’t really like the way that looked, so I decided to play with the recipe and make it white on chocolate instead. I got so excited about experimenting that this is apparently the only picture I remembered to take.
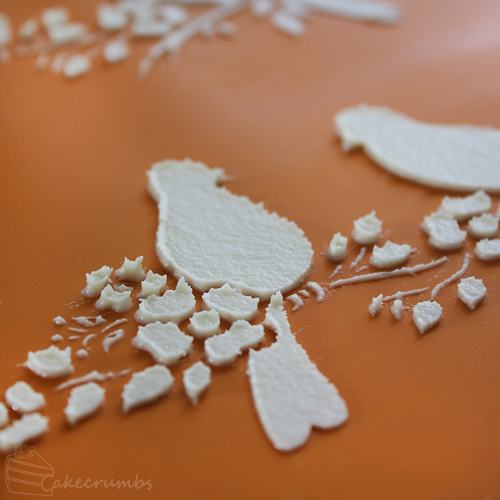
But I’ve explained this process step-by-step in the past if you need a photo reference. The only difference here is that instead of spreading it straight onto the silicone mat, you put a food-grade stencil down first.
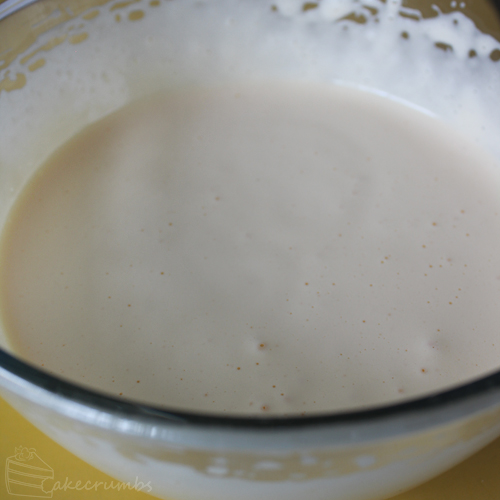
All the sponge recipes I used in this cake were for plain sponge. I could have dug around for chocolate recipes I suppose, but I’m extraordinarily lazy like that. Instead I used my base recipe and added a chocolate paste to it. I had no idea if this would wreck the baking process or not, but it all went fine thankfully.
The hardest part about making a joconde is deciding what to put inside. A lot of the time you see them full of a single dessert, like mousse. Now, I wouldn’t say no to a whole mousse cake, but I thought the other recipients may not share my gratuitous love for chocolate mousse. To break up the entrement a bit, I decided to add a couple layers of chocolate genoise sponge. The lovely thing about this sponge is that it shrinks slightly when cooking, so it becomes the perfect size for this process.
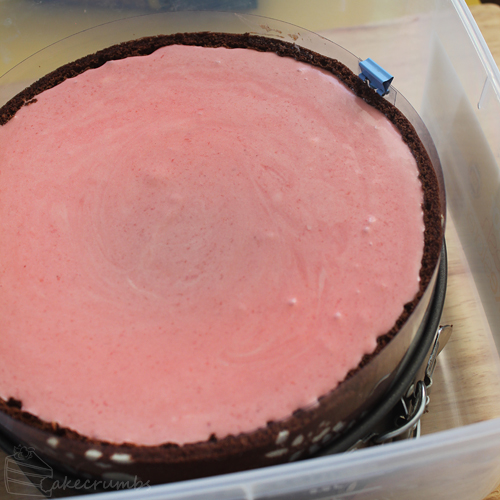
I used a tin identical to the one it was baked in and layered it with the joconde imprime. I cut the genoise sponge in half, and put the slightly domed half on the bottom layer with the dome facing inwards.

Then I covered it in chocolate mousse.

I allowed that to set for 2 hours, then added the second half of sponge on top before returning it to the fridge to set completely.

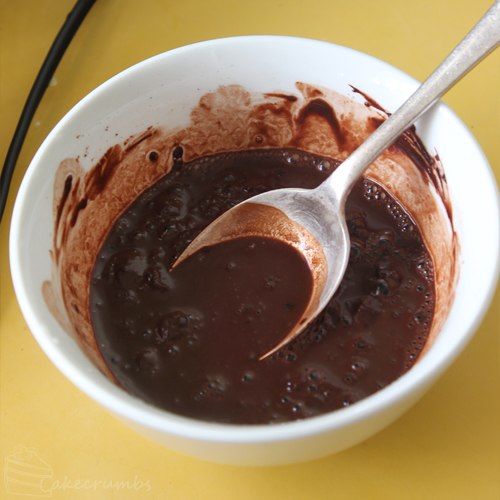
The next morning I set about making the crunchy layer. This was a layer I adapted from the Lolly Bag Cake, omitting the sprinkles and popping candy in an attempt to make this one a bit more refined. I started by making the pailleté feuilletine, which is just crushed up crêpes dentelles. You can grab the recipe for that here if you’d rather not buy it.

I made up the chocolate hazelnut ganache and the folded all that pailleté feuilletine through. Here it becomes really hard to not eat the entire bowl right then and there because it is so good. But I promise you it’s worth the wait, cause it tastes even better when set.

Last of I decided I needed a fruity layer, preferably something on the bitter side to balance out all that sweetness and chocolate. What better fruit than raspberries?
They funny thing about all of this is that I was completely making it up as I went along, unsure of what quantities I should be using or if it would all fit. When I poured the raspberry mousse in it filled it right to the very top. I had originally wanted it so the raspberry mousse would be seen over the top of the joconde, but the design of the stencil meant I couldn’t make it as short as I intended. It makes this whole thing look way more calculated in approach than it actually was.

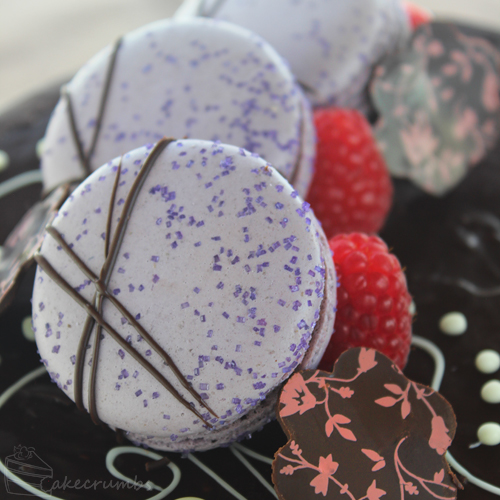
Last of all, I covered it in a layer of dark chocolate ganache and started decorating it. I piped some white chocolate on top and added some fresh raspberries, lavender macarons and some chocolate blossom shapes I made a bit more interesting with a chocolate transfer sheet.
The stencil decoration around the side turned out a lot better than I expected.
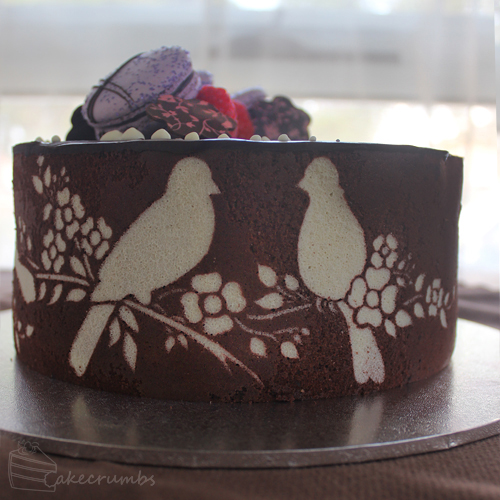
In all the other instances I’ve used the decor paste it’s appeared externally over a very small area. In the larger sections of these birds, the sponge ended up becoming slightly concave. This might just be the effect of having a large area of the decor paste, I’d have to experiment to find out, but I really loved the extra dimension it gave to the birds.

I couldn’t wait to slice it open. But I had to. I went out with my boyfriend and his family to a restaurant for a really lovely Indian dinner, and when we finally returned home to it I was almost in too much of a food coma to contemplate eating it. Almost.
I finally cut it open to see if this experiment had worked and was delighted to find all the layers had behaved.
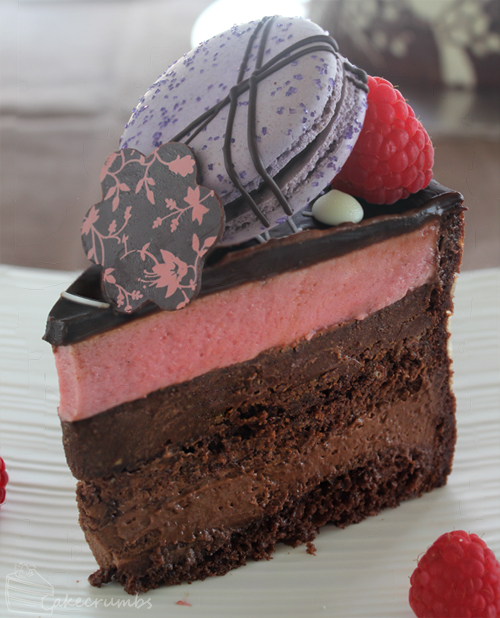
We all had different layers that were our favourites. My sister loved the chocolate mousse part the most, while Cameron and his mum loved the raspberry part and the hazelnut crunch better. I just loved everything.
| Chocolate, Hazelnut and Raspberry Joconde |
| Ingredients |
| Patterned Joconde-Décor Paste
100g (3.5oz) unsalted butter, room temperature 100g (3.5oz) icing sugar 100g (3.5oz) egg whites (approximately 3 large eggs), reserve egg yolks 110g (3.9oz) cake flour 1 tsp dutch processed cocoa 1 tsp boiling water Joconde Sponge 45g (1.6oz) egg white (approximately 1 large egg), reserve egg yolk 5g (0.17oz) caster sugar 40g (1.4 oz) almond meal 40g (1.4 oz) icing sugar 15g (0.5 oz) cake flour 15g (0.5 oz) unsalted butter, melted 1 tbsp dutch processed cocoa Genoise Sponge 3 free range eggs 85g (2.75oz) caster sugar 115g (3.5oz) plain flour 40g (1.4 oz) butter, melted 1 tbsp dutch processed cocoa 1 tbsp boiling water Chocolate Mousse 1 tsp powdered gelatin 1 tbsp tepid water 1/2 cup (125ml/4.2fl oz) milk 175g (6.2oz) dark chocolate, chopped 300ml (10fl oz) thickened cream Chocolate Hazelnut Crunch 120g (4.2oz) dark chocolate 150g (5.3 oz) hazelnut paste* 150g (2.1 oz) pailleté feuilletine* 1.5g (0.05 oz) ground Murray River pink salt [can use sea salt] 35g (1.2 oz) vegetable oil *you can make both these ingredients from scratch as show here Raspberry Mousse 500g (17.6oz) fresh or frozen raspberries 2 tbsp lemon juice 60g (2oz) caster sugar 2 tsp powdered gelatine 180ml (6fl oz) cream 1 free range egg white 60g (2oz) caster sugar [extra] Chocolate Ganache 200g (7oz) dark chocolate, chopped 100ml (3.4fl oz) cream 20g (0.7oz) butter, chopped
|
| Method |
Décor Paste
Joconde Sponge
Joconde Imprime
Genoise Sponge
Chocolate Mousse
Assembly:
Chocolate Hazelnut Crunch
Raspberry Mousse
Chocolate ganache
|


This is stunning and very mouth-watering! Thanks for sharing 🙂
Thanks so much!
This really is so pretty !
Oh my word, THAT is a stunning cake
wow, what a stunning cake!
Wow. I’ll be darned if I could make a single macaron that delicious looking, let alone that plus an entire multi-layer cake. You never cease to amaze me. 🙂
Congrats! You have a fantactic blog, delicious recipes and wonderful cakes decoration. I like this a lot 🙂
I want one!
Wow! That is so impressive. I have never made that type of cake before, but I’m certainly going to tackle it now because you’ve broken the process down step by step and it seems it just might be manageable. I’m travelling at moment, and one thing I miss dearly is baking! Can’t wait to get home to get back to it. Thanks for always sharing creative, amazing creations and ideas.
I’m not sure if I was more impressed by the flavours, how decorative it was, or how well it sliced!
Pingback: Super Moist Pumpkin (or Carrot) Spice Cake [vegan] | Cakecrumbs
very intimidating to even consider trying!! so so so pretty!!
Hello. I came across this recipe and I’m determined to make it for a friends birthday, however I’m unsure as to what ‘cake flour’ is as we don’t use that term here in the UK? Is it a self raising or a plain flour? If you could let me know I’d be thrilled!
Beautiful cake! Truly a work of art. I recently starting making joconde and love how impressive they look. So far I’ve piped my decoration on and they’ve turned out really nice. I decided I wanted to try more elaborate patterns, such as damask and paisley, and a stencil would be the best way to do them. I agree, it is much nicer to use more than one layer for the entremet. Makes them more interesting to have different layers that play well together, this is what I’ve done as well. I like your use of the genoise. I think I’m going to try a brownie base for my next one… Also, love how you decorated the top with the macarons…nice touch! I’m going to use yours for inspiration for my next fun project!
So wonderful to hear from another joconde lover!
Stunning presentation, beautifully done ,amazing what you have achieved for self taught.
I am self taught also, just not at your level (yet!) I made one of these desserts couple or years ago but not since, looks like I need to find an excuse to make one.
Happy to have come across your site for more inspiration and ideas.
Thank you so much for sharing, I love it
I’d love to buy that birdie stencil…can you advise where I can buy it from? Hopefully online…
This looks wonderful! I think I’ll try to make it, though it will be my first joconde. One question (& please forgive me if I’m being dense): the paste and joconde sponge call for cocoa. Did you use cocoa in your pictured version? If I wanted to replicate, would I just leave it out of the sponge?
This looks wonderful! I think I’ll try to make it, though it will be my first joconde. One question (& please forgive me if I’m being dense): the paste and joconde sponge call for cocoa. Did you use cocoa in your pictured version? If I wanted to replicate, would I just leave it out of the sponge?
Could setting times be significantly reduced by using agar instead of gelatin? Or would simply making smaller cakes work best? Alternatively could I make the mousses with agar ,allow them to set overnight, and then assemble the cake by piping out the mousse?
Because I’m very excited to try this but unsure of how to make it work without setting aside an entire day or more!
Nice cake, reminds me on chef Rachida’s opera cake
Ayyy !!! Esta todo en inglés 😕 .
No se podría traducir al español , Pues me encantaría poder realizar esas maravillosas recetas .
Pingback: Joconde Imprime Recipe - Cake Baking