
I often get told from friends and family, and sometimes even people I don’t know, that I should go on MasterChef. I kind of imagine that this is how people with voices like tortured cats end up on Australian Idol or X-Factor and end up embarrassing the hell out of themselves: well meaning people want you to follow your hobby to wonderful goals, but it takes more than a passion for singing or food to make the grade. I’m okay at baking, but I don’t have the skills in a lot of mediums necessary to avoid total annihilation. I’m also insanely indecisive, slow, messy and I always think I know better than the recipe. Knowing me, I’d be an hour into the challenge and still standing in the pantry trying to work out what to cook.

But there is one thing that makes me entertain the idea for a moment: pressure tests. These contestants get to not only meet, but be mentored by the most accomplished pastry chefs in the world. They then get to attempt these wonderful recipes with every ingredient and tool right there at their disposal in a professional kitchen. I always watch those episodes with the deepest sense of longing. I’d jump at the chance to get to create all those stunning desserts that are practically impossible to make at home.
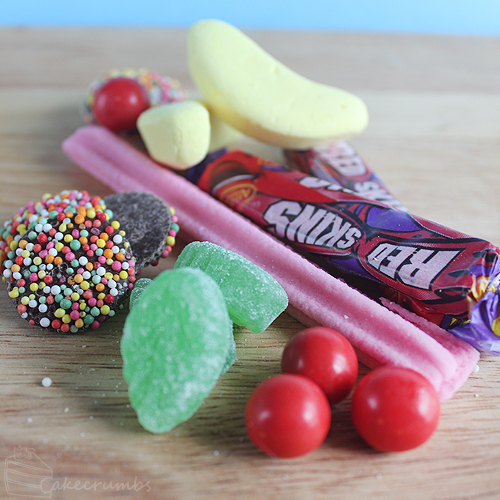
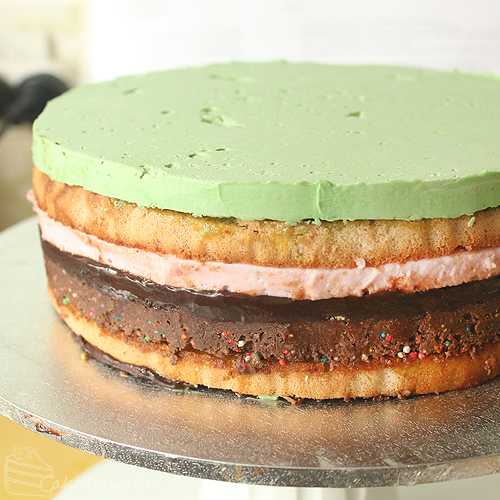
This year, one of the first such pressure tests was provided by Bernard Chu, an accomplished Melbournian pastry chef of LuxBite. It was Kids Week on MasterChef, and he bought in a cake that perfectly fit this bill: his Lolly Bag cake. This layered beauty was the perfect nostalgia trip of many of the lollies we grew up with as kids. As soon as I saw it, I knew I just had to make it.
I’ve had moments like this after many Pressure Tests or other dessert challenges. The recipe goes up on the MasterChef website, I go to look at it and quickly become dismayed by the ingredient list. Or the required equipment. Or the cost. Or all three at once. I almost had that same moment while reading through this recipe and doing the maths. But no, I finally decided, I was not going to be defeated by it. I was going to save it up for a special occasion and tackle this beast of sugary goodness.
I don’t know if I wanted to bake it or taste it more. Mostly I was skeptical that all those flavours could go together and not confuse the palatte, so I had to try it. I suppose I could have made the trip to LuxBite and just paid $7.50 for a slice, but that’s just not my style.
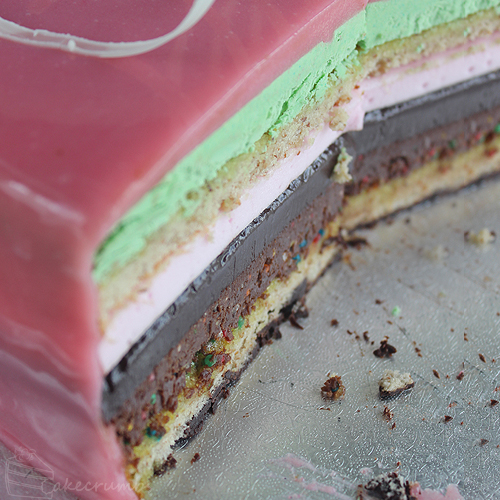
The post that is going to follow is going to be enormous, I should warn you. As you may have guessed from all those layers, it’s a long and involved multi-step process. It will look intimidating, but when you break it down you’ll find it’s really quite easy. It’s a relatively technical cake, though not the worst. Having experience with things like making sugar syrups, whipping meringue to perfect soft peak, making ganache and baking sponges will help a lot. If you’ve never done any of these things you may want to have a play around with individual components in easier desserts before taking on the whole lolly bag cake.
I made a number of changes to the recipe to make it home-kitchen friendly, as well as a few other preference changes. This is as specialty-equipment free as possible, but you will want a candy thermometer and a stick blender at the very least. You will also need enough freezer space to freeze at least one layer at a time, preferably enough for the whole cake to sit in later. I’ve documented every step along the way to give you a visual guide of what bits and pieces are supposed to look like and will be providing plenty of anecdotes in the hope of guiding even the most beginner of bakers through this challenge. So hit the jump to read all about it!
Lets begin with the first of many changes from the MasterChef recipe. If you browse LuxBite you’ll come across several images of their cake, and the first thing you’ll notice is a very different order of layers as well as only one mint layer.

I figured there was probably a really good reason for this, one of which being the balance of flavour. Mint can easily over-power any dessert, and throwing in an extra layer to make it pretty for telly was likely giving precedence to appearance over flavour. I decided to make my cake more akin to the one of LuxBite’s shelves.
But before I even got started on the layers, first I had to make some of the ingredients. Four of them, in fact. As with many cheffy recipes, there are a lot of ingredients in the recipe that are either difficult, impossible, or just exorbitantly expensive to buy if you are not in the industry. I decided to both save money and be more involved in the processes my making some of them myself.
Some of you may remember the crêpes from the other week. Crushing up crêpes dentelles gives you pailleté feuilletine, one of the ingredients for the Freckles Crunch. In some countries it is easy to find these crepes in stores, but certainly not here. Hit up that post to get the recipe for pailleté feuilletine.

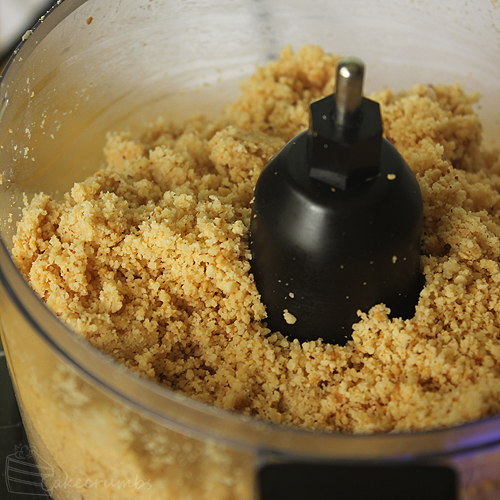
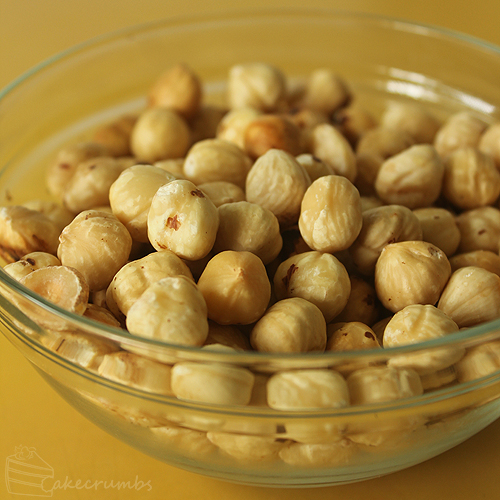
Next I made the hazelnut paste for the same layer. I’m sure there are supermarkets that sell it, but I could not be bothered going on a wild goose chase for something so easily made at home. I took 150g of hazelnuts, and roasted them in the oven at 180°C for 10 minutes. Doing this allows the shells to be easily rubbed off. It is then as simple as chucking them in a food processor and grinding them up until fine. Then you drizzle in a little vegetable oil (for me this was a bit over a tablespoon) a bit a time and keep processing the mixture until it becomes a smooth paste. Simple as that!

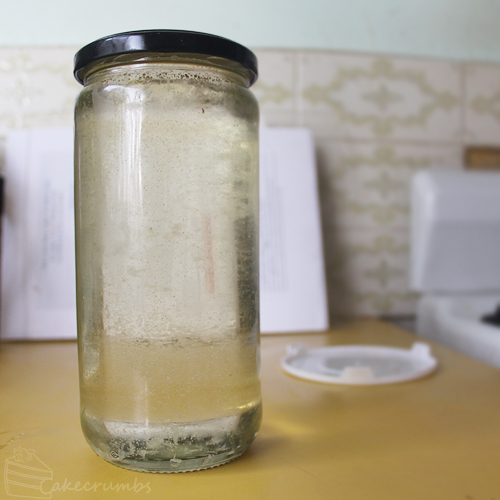
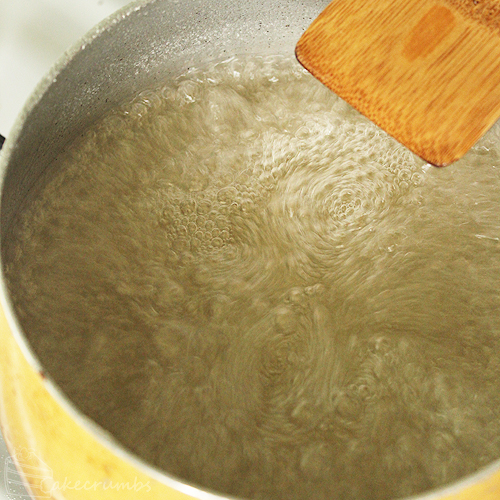
Next came the invert sugar, which is used for the musk-mallow layer. Invert sugar is a sugar syrup that contains fructose. It’s used in a lot of cheffy recipes due to its ability to retain moisture and lack of tendency to crystallize as other sugars do. It results in a nicer texture, and also works as a preservative, increasing the shelf life of your products. It’s really easy to make with the help of a thermometer and some patience. The quantity I made produces a lot more of that stuff than you’ll need, but I intend to use it again (in most desserts you can typically replace 10% of the sugar with invert sugar). It’s also a lot easier to control the temperature of larger batches of syrup, but feel free to half or quarter the recipe if you wish. You can substitute invert sugar with another sugar syrup, like corn syrup or honey, but I assume any substitution will affect the taste.
Creating invert sugar is as simple as taking 1 kilo of caster sugar, 480ml of water, 1g of cream of tartar and combining it in a heavy-based saucepan. Much like when making toffee, you cook it over a low heat, stirring, until the sugar dissolves. Once it has, bring the mixture to the boil and, without stirring, cook it until it reaches 114°C (236°F). Immediately remove it from the heat, cover, and allow it to cool completely. The mixture will store in an air-tight container in the fridge for 6 months.


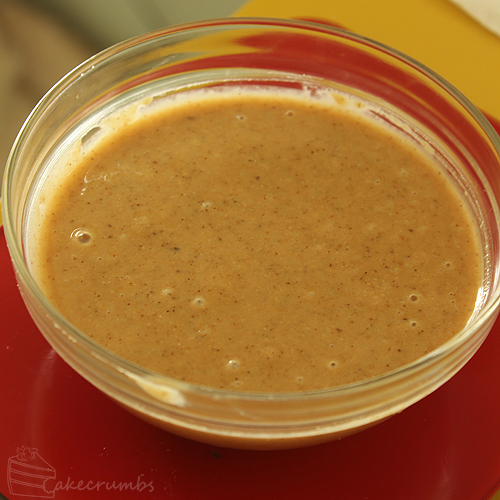
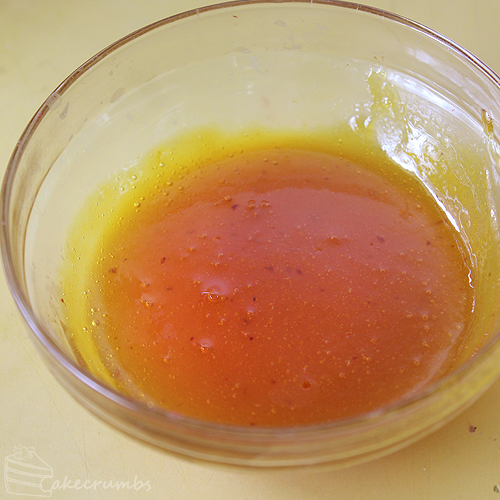
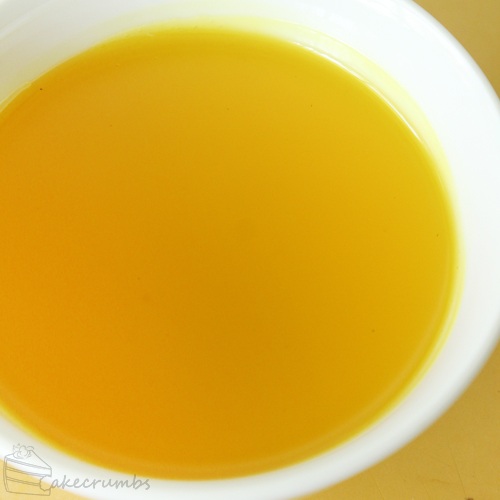
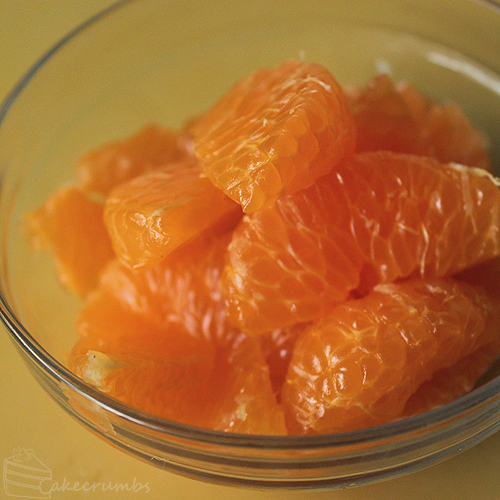
Last of all the ingredients I made was the mandarin concentrate. This is used in the Jaffa ganache layer to give the orange flavour to the chocolate. You could always sub a flavouring essence if you prefer. I did find some of the concentrate, but I was not prepared to pay $40 for it. Instead I grabbed a bag of mandarins for $1 and set about making it myself.
I used about 4 mandarins. I peeled the rind from them and removed all the pith and seeds from each segment. I processed them in a food processor, then strained the juice through a fine mesh sieve to remove the pith. I added a tablespoon of caster sugar to the juice, then simmered it over low heat until it reduced down to a viscous enough looking concentrate. I could find no images of what the concentrate was supposed to look like, only those of external packaging, so I took a guess it how thick it needed to be. I figured the ganache needed to be set, so the concentrate shouldn’t be particularly runny at room temperature. Mine was almost set once it cooled.


Phew! Now those are all our ingredients made! Exhausted yet? We’ve barely begun! Now it’s time to get on with our cake.
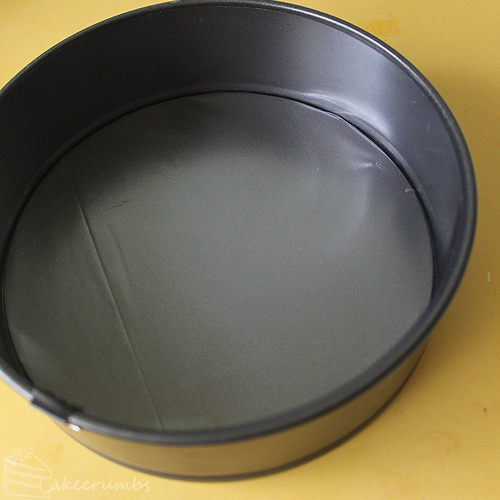
One of the last major changes I made to this cake was to make it round. The method calls for 7 30x30cm square silicone trays. How about no. I certainly didn’t need a cake that large and I certainly wasn’t buying 7 trays for something I was likely to do once. I also, in general, much prefer the look of round cakes so I intended to make it round. I used a 22cm round springform tin. I lined the base with plastic and the sides with acetate, which I highly recommend for lining any non-baked dessert. I have three identical springform tins, but even if you only have one that’s fine. You can leave the layer to set in the freezer, remove the tin and transfer the layer to an air tight container to stay frozen until required.
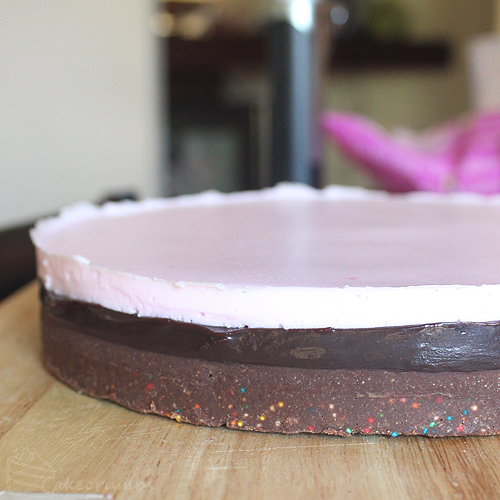
The first layer I began with was the Madarin ‘Jaffa’ Ganache. This is one of the few layers that doesn’t actually have the lolly in it.
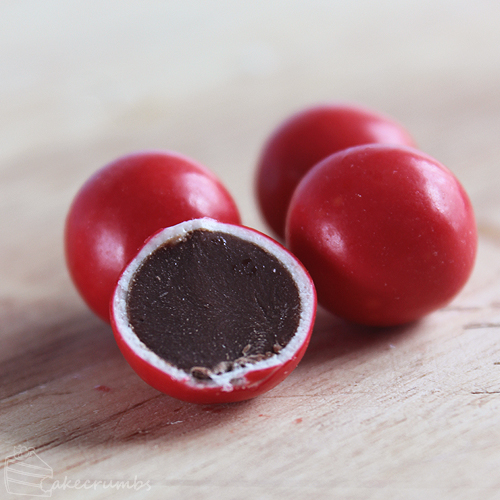
Jaffas are hard shell coated balls of chocolate. The outer shell is orange-flavoured, harking back to the Jaffa orange for which the confection is named. It’s one of those party staples, alongside M&Ms and Maltesers. They are absolute tooth-breakers until you learn that the trick is to suck on them first.
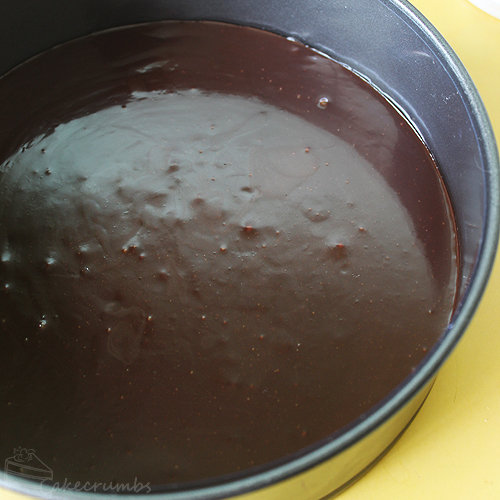
This layer is incredibly simple and a good way to start if you need some confidence going forward. It’s a simple as heating up some cream, adding gelatine and pouring it over the chocolate.
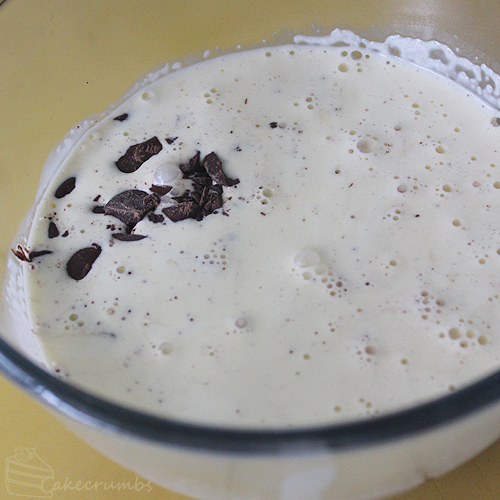

Fold in the mandarin concentrate and you have your first layer done! You can pour it into your lined tin and leave it to freeze.
Full of confidence you can move onto the next, much more involved, layer. The next layer is the Spearmint Leaves Buttercream.

When I first saw this on MasterChef, I though Spearmint Leaves was something I had no childhood affinity with. I’m not really a fan of soft jelly lollies. There are so few I like. I remember in Grade 1 being in the principals office with my parents and being offered a giant jar of soft lollies that would have made most kids go wide-eyed. But not me. There wasn’t a single lolly there I liked. But when I popped this packet open and tried one, the flavour was very familiar, so I must have had these at some point in my childhood.
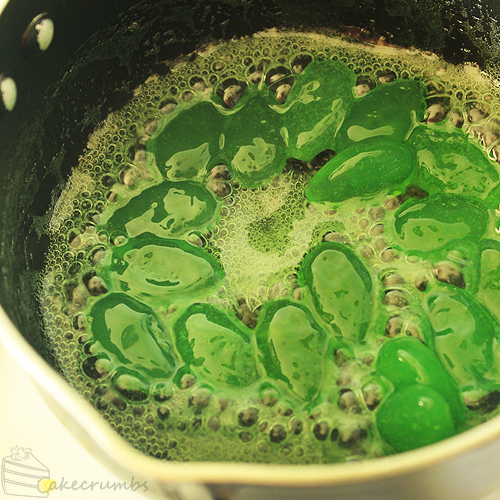
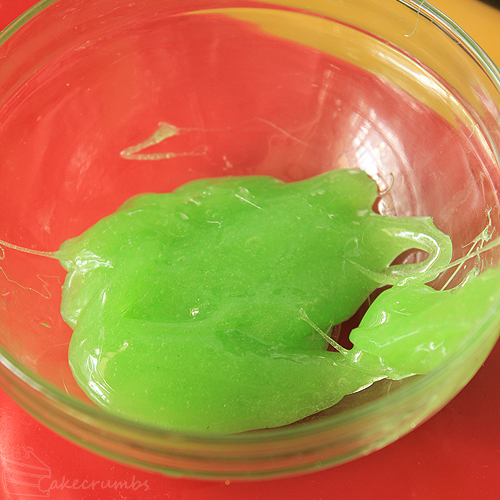
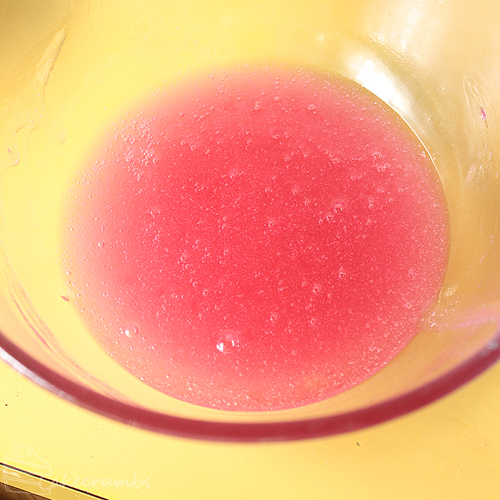
The first step of the buttercream involves making a mint paste by boiling down the leaf lollies and blending them. The result is so sticky and messy and wonderfully aromatic. There are so many processes with this cake that result in insanely sticky messes. The child half of me loved it, while the adult tried to not think about the cleaning up later.
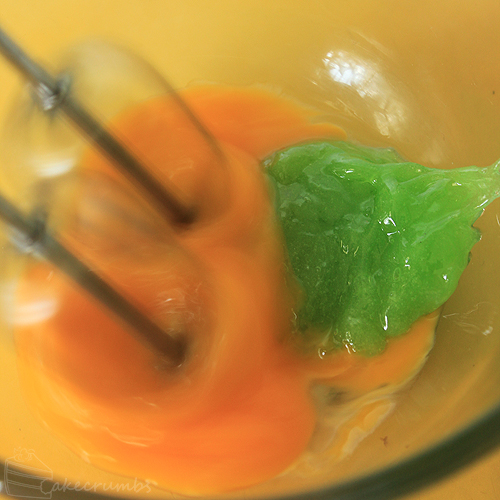
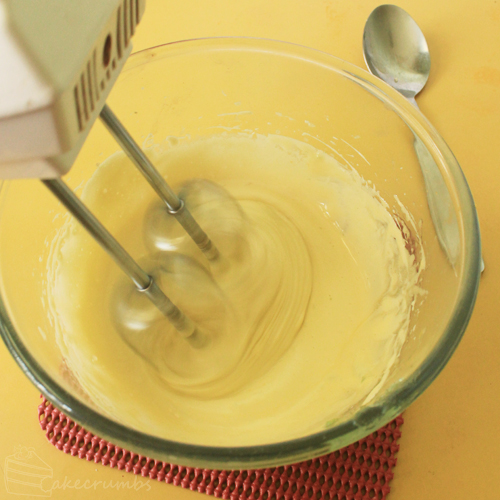
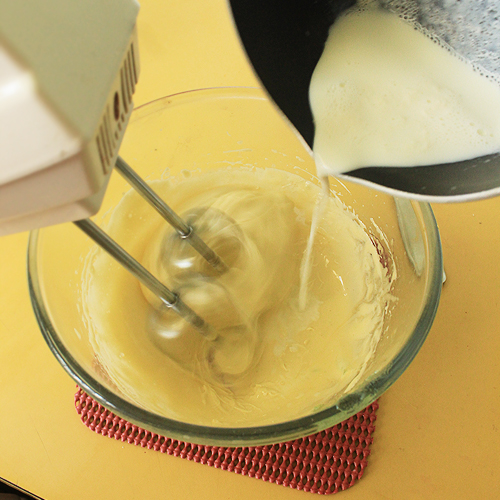
Don’t allow your mint paste to get too cold, as it will make it harder to beat into the egg yolks. This step requires a bit of multi-tasking. You’ll need to warm your milk mixture over the stove while whisking the eggs and mint paste together. Then slowly pour the hot milk into the mixture to temper the eggs. You’ll then return the whole lot to the pan and cook it until it reached 85°C and you have a delicious minty-custard.
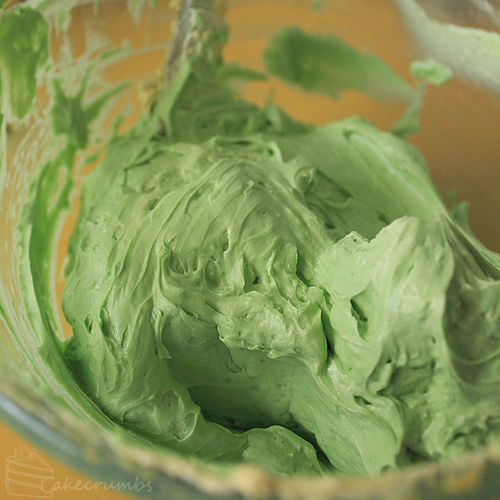
You’ll beat this custard into the butter, which needs to be at room temperature, until you have a soft and luxurious buttercream. Into that you fold a little meringue as well.


You now have a wonderful buttercream, but it doesn’t look very minty. here the recipe called for powdered food colouring. I assume gel paste will work just as well. You will also add in some eucalyptus oil, which serves to intensify the mint flavour that has started to get lost under all that butter. If you can’t find food-grade euc oil, you can use peppermint essence instead.
The most surprising part about this layer was that it actually tasted like the lollies. We all expected it to taste like a generic mint flavouring but it perfectly represented the taste of the leaf lollies. Delicious!

While that was freezing, I set about working on the Freckles Crunch.
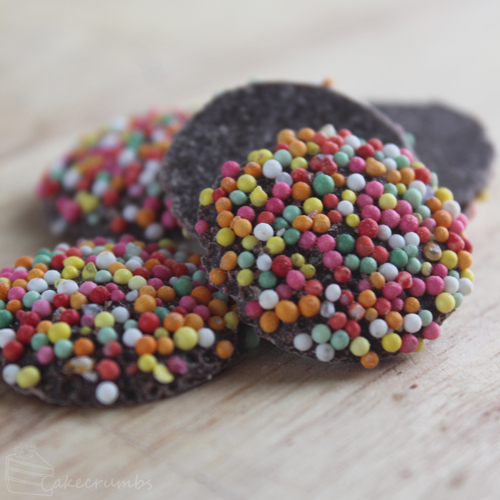
Freckles are simply milk chocolate buds coated in 100s & 1000s. These buds were a milk bar and canteen staple, always found alongside the plain milk chocolate, white chocolate and caramel chocolate buds. You’d get a little white bag and fill it with a quarter of each, hardly able to decide which one you liked more. Then we’d sit there sucking on the freckles to dislodge all the 100s & 1000s first before eventually devouring the remaining chocolate.
This layer is the only other layer to not contain the lolly it’s named after. But it does contain some of the most exciting ingredients ever. One of which being popping candy. Popping candy is so hard to get here lately. There used to be confectionery everywhere with popping candy, and I miss the regularity of it.

I was so excited, apparently, that I forgot to take photos of the process. I was also making a seperate cake by this stage at the same time so my documentation was all over the place. But it’s endlessly simple: you melt the chocolate and hazelnut paste together and then stir in the rest of the ingredients. What results is a gourmet nutella kind of base, with all the colour of the Freckles, the excitement of the popping candy and the extra crunch of the pailleté feuilletine. It’s perfection. No prizes for guessing my favourite layer.
The next layer is the only one you don’t have the freeze. It’s called Musk Mallow and, as the name suggests, it’s marshmallow made out of musk sticks. When I saw it on the TV I didn’t think they meant actual marshmallow, but no, it’s actual marshmallow. Cue excited freakout.
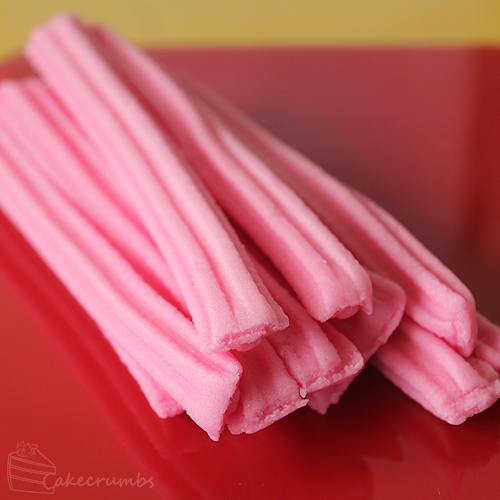
Musk sticks are these star-shaped tubular lollies that are, unsurprisingly, flavoured musk. Later on a whole range of fruity flavours came out and you could buy mixed packages of them, but musk sticks have always been the best and the original. They were a staple at every birthday and in every lolly bag and in ever sugar-fueled trip to a milk bar or canteen. They are so delicious and it’s easy to just chew your way through them, but as kids we were more inventive about how we ate things than that. We’d sit around in the school yard with a 50c bag of musk sticks and make pencil shapes out of them by sucking on one end and rotating it. It would take forever to wear it down to a good point: the pointier your point the more patient you had to be and the more school yard cred you got. These days eating them any other way still feels moderate sacrilegious.
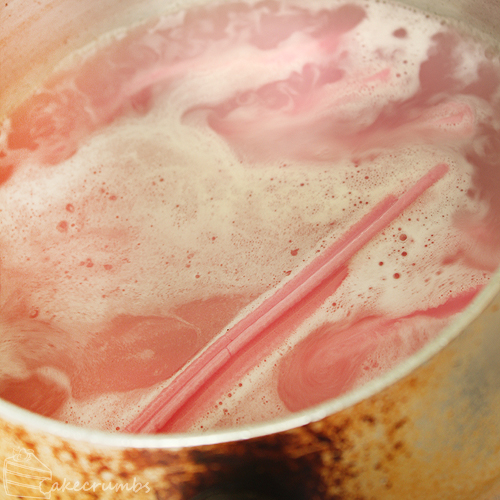

The musk sticks for the marshmallow are boiled down in a sugar syrup. While that’s cooking, you heat the invert sugar and add the gelatine.
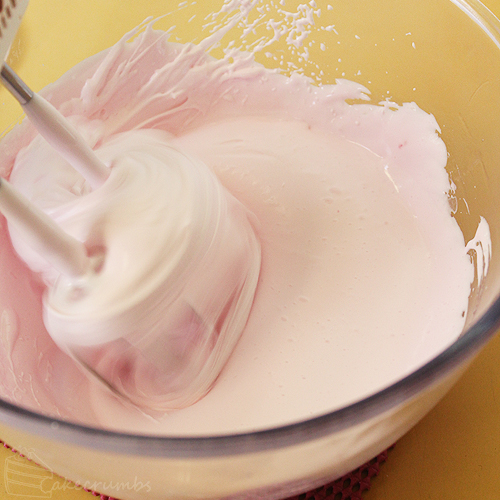
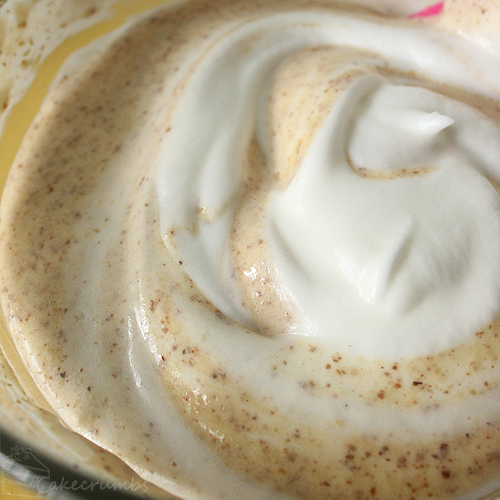
When the syrup reaches temperature, you can pour it in and combine it with the gelatine mixture. Then it’s a matter of beating the mixture until it’s light, fluffy, and tries to consume your beaters.
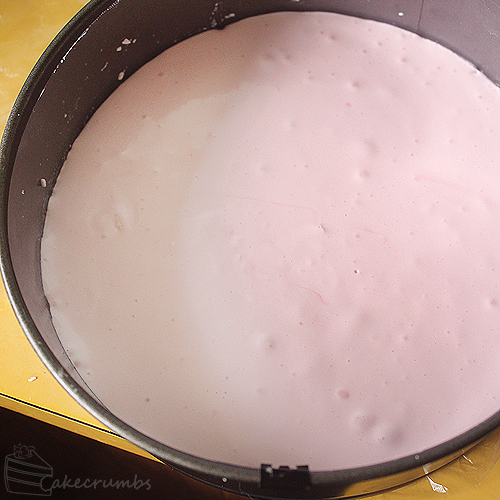
If your musk-mallow gets too cold before you pour it in, it will start to set. This happened to me while I was trying to take photos of it to show the texture. It was half set and when I poured it in the tin I could no longer spread it evenly. I was contemplating making another mixture when I chanced zapping it in the microwave for a few seconds as I would when making marshmallow fondant. It worked perfectly. The marshmallow can be melted down and re-set with no deterioration of texture in so far as I could tell. Be careful to only melt, not cook, it if you need to rescue it.
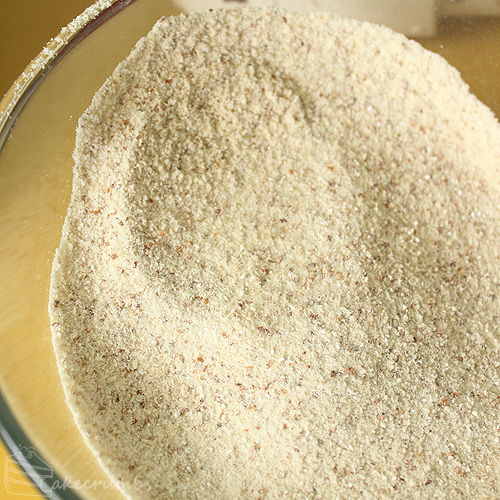
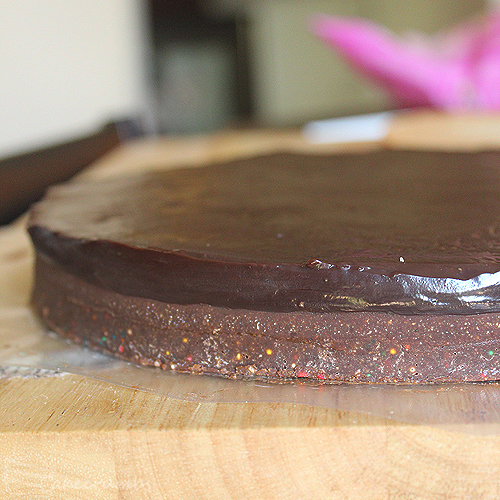
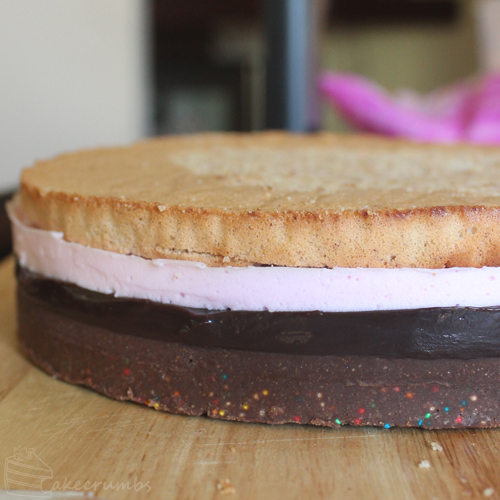
Now that’s all the filling layers done! It’s time to bake the cake! There is not very much cake in this cake, but the Joconde Sponge is it. These sponges are very easy, as far as sponges go. Blitzing the almond meal, icing sugar and flour in a food processor is always a good first start with these sponges to get rid of all lumps and bumps
In the main mixture you’ll beat in egg yolks, then you’ll fold in some egg whites and bake.These sponges always take a matter of minutes to bake, so you want to hang around and keep a very close eye on them.
Once baked and cooled, you’ll spread a layer of melted chocolate onto the base of one of them. This gives you a sturdy base for your cake as the sponges are very light and very moist.

“There’s no lollies in that layer, though,” you might be thinking. But no, we’re no done yet. We get to add in bananas! These banana lollies are not only a common childhood lolly, but you will still find them in pretty much every single bag of mixed lollies sold throughout Australia.

They’re one of Cam’s favourite things ever, so I was glad he wasn’t around to watch me boil them up for the Banana Syrup.
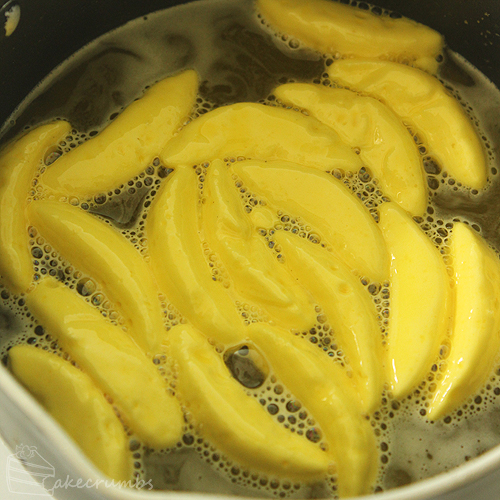
When you assemble to cake you soak the sponge in the banana syrup, giving the sponge the lolly flavour we know and love.
Now it’s time to settle down for a nap. Or eat a giant bowl of fruit — cause if you’re anything like me you’re in a bad habit of licking your fingers and by now you’ve been pumped with so much sugar that you’ll be feeling sickly.
But you’ll be enthused for the next part, because after so much hard work assembling the cake is truly cathartic.
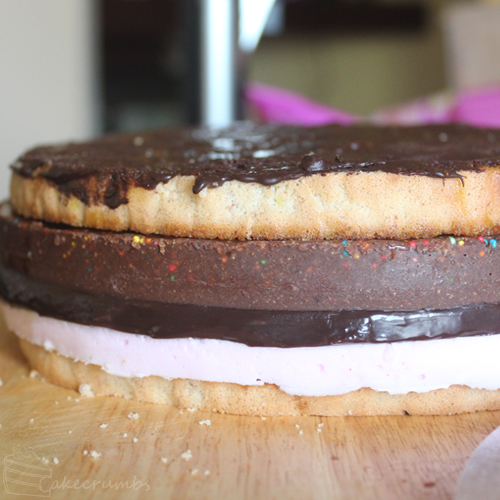
I ended up assembling my cake slightly differenty to the method. My ganache was set well enough, but it was sticky. Mine adhered to the plastic lining of my tin, so I attached it to the freckles layer first then set about removing the plastic. If this happens to you, you can dislodge the plastic lining it by warming the ganache at the surface. I did this by dipping a knife in hot water and running it over the plastic. This melted a fine layer of ganache between the plastic and the main layer and allowed me to peel back the plastic. This meant I couldn’t turn over the ganache layer without it adhering to another surface, so I kept building up.
I added the musk layer and then the joconde. The joconde finally provided a layer that wasn’t sticky, so I could flip the whole thing upside down and add the base layer of joconde. At last came the buttercream layer.
As I discovered when I baked and cooled the sponge, the sponge will shrink from the edge of the pan, completely messing up my plan of perfectly even layers. I had thoughts of baking it again, but the sponge was so perfect and wasting it seemed a shame, so I simply trimmed back the other layers. I would recommend baking the joconde in a tin bigger than the one you use for the rest of the layers, then cutting it down to size before assembly. For the assembly you also need a blowtorch to adhere the layers. if you don’t have one you can warm the surface of layers with a hot knife.
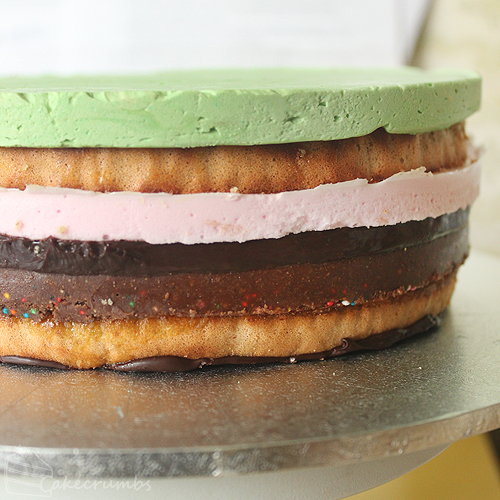
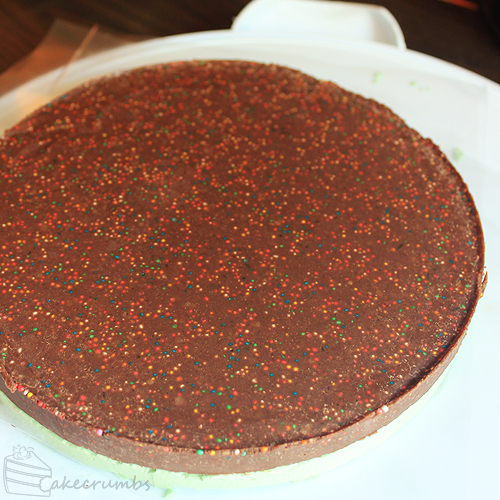
Now the cake is assembled, breathe a sigh of relief — we’re almost done! All that’s left to do is make the Redskin Glaze.
Redskins are these unfortunately named lollies. The connotations of the name are something that most Australians would be oblivious to. It’s one of a list of inappropriately names childhood sweets we had, though remains one of few that haven’t been renamed. This probably owes to not having a large Native American population and our general ignorance as to the meaning of it. The packaging used to feature an American Indian when we were kids, but I was glad to see when I bought them they now only feature a generic red character, so at least there has been some cultural sensitivity around the branding. I am aware of the offensive nature of the word, so I am loath to use it in the blog, but as it is the name of these lollies I’ll be continuing to use the word in that context. I do apologise to any readers who are offended by the term.

If most Aussies are oblivious to the term, as kids we were even more so. As with every politically incorrect confectionery we grew up with, all you cared about was the sugary goodness within. The bars themselves are really chewy, with a raspberry-like flavour, but the flavour is quite unique. We would eat these guys by the handful, but like most of our favourite lollies there was always a method to our madness. We would suck on them until they started to soften, then we’d push them around our top teeth like a mouth-guard. As kids do, we thought we were brilliant and would grin at anyone who’d look at us with our Redskin smile until it dissolved or we just got hungry. I’m sure our parents shuddered at our red-stained teeth and tongues. We’d also notoriously accidentally swallow a lot of paper as we seldom inspected the lolly for properly removed packaging before shoving it down our gobs.

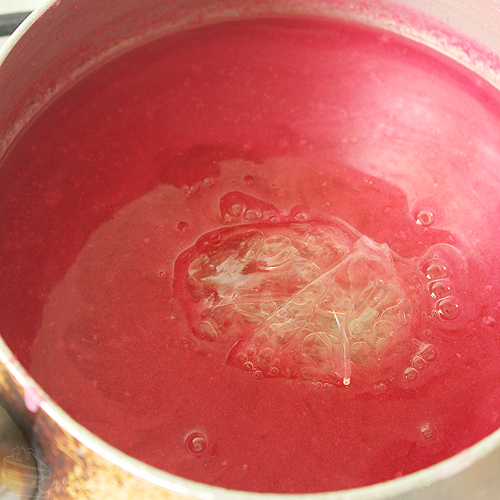
Making the glaze is another simple process. The Redskins are boiled in the milk and sugar while you take a stick blender to the mixture to break down the lollies. Once it’s brught to temperature, you add in the gelatine and mix it through.
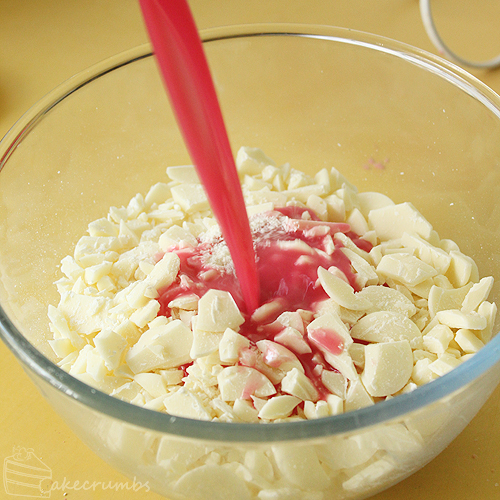
That mixture is then poured over the white chocolate and stirred through until the chocolate melts.
All that’s left to do is pour it over the cake and decorate!

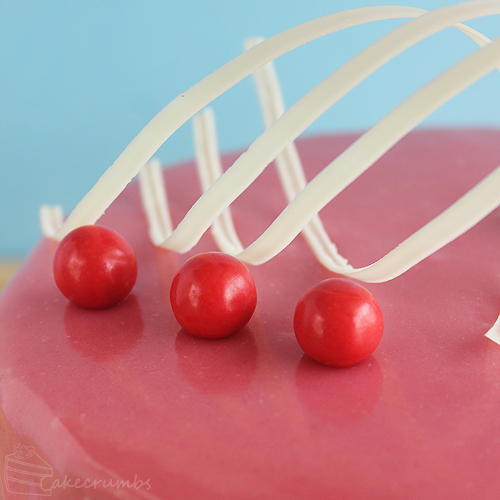
The original cake was decorated with red isomalt spirals. I was so indecisive about whether to include them or not. I wondered if they would look as fitting on a round cake as they did on the rectangle, or if the red was not contrasting enough against the hot pink. I spent so long being indecisive that eventually it was too late to organise the isomalt and the decision was made for me. I opted for white chocolate spirals instead.
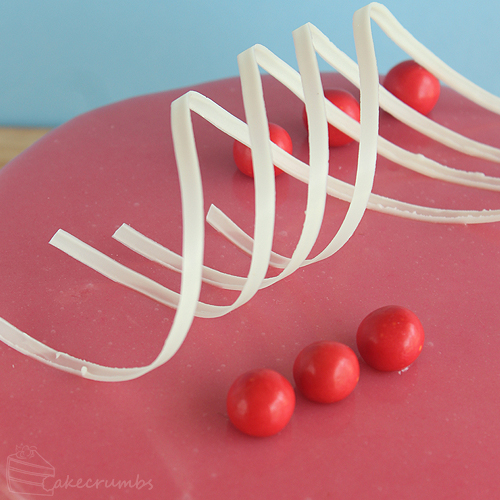
I also added some jaffas onto the cake to give them a bit more representation than they’d gotten on the layers.
Cutting it was so nerve-racking, but the layers came out just as I’d hoped.
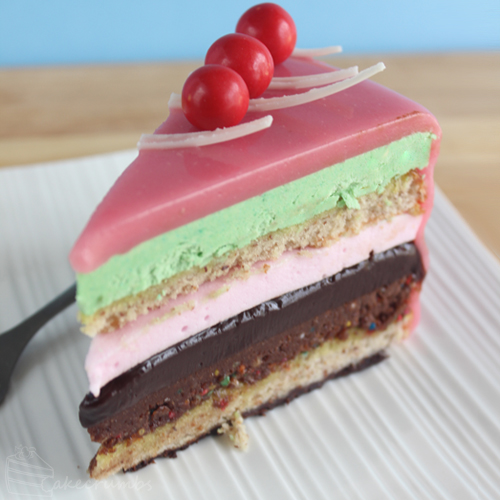
The whole cake was a fantastic nostalgia trip. I don’t think I’ve ever been so giddy and excited when making a cake. All of us were equally giddy and excited when it came time to eat it. This was especially so when anyone got to the Freckles Crunch layer and discovered the popping candy inside! You’re never too old to get excited about popping candy.

If you manage to get all the layers into your mouth , you tend to find it does go together. You kind of lose the distinction between layers and it just becomes and enjoyable sweetness, with the mint kicking in as a cleansing aftertaste. It wasn’t the confusion of flavours I thought it might be, though most of us did prefer eating it layer-by-layer.

It’s the kind of cake you want a very small slice of. It’s quite rich and sweet. But the beauty of small slices is that it lasts a lot longer. The recipe gives no indication as to whether it should be served at room temperature or anything: the last thing it says is to put it in the freezer. I took it out a few hours before serving it the first time and found the buttercream layer was not as soft as I’d have liked (though perfectly edible). After, I left the cake at room temp and found it was much better that way.
The following recipe is the one I used to make this cake, and the methods I used to do it. Every list of ingredients is either halved or quartered from the original. I opted to use dark chocolate instead of milk chocolate, as in the original, as I felt it would be sweet enough without needing milk chocolate. In a lot of the cases I followed the same method as provided by Bernard Chu, but in others I changed the method to either simplify it or to suit working in a home kitchen. If you want to use or look at Bernard Chu’s recipe, you’ll find it here on the MasterChef website.
Ingredients listed here with an asterisk are those I made myself, and recipes for them are above in the main post. For the popping candy you will need fat-coated popping candy, or else it will dissolve into the chocolate. I bought mine here. If you can’t find it local, you can always coat any other popping candy with shortening or cocoa butter first. I know most of my readers are from overseas, so a lot of these lollies will be unfamiliar to you. Some you may be able to substitute, and my descriptions of each lolly are aimed to help you know what to look for. If you want to obtain these lollies, there are a number of Australian food stores online that will ship overseas, like this one.
| Lolly Bag Cake |
| Ingredients |
| Chocolate Jaffa Ganache
1/2 gold gelatine leaf Musk Mallow 4 gold gelatine leaves Spearmint Leaves Buttercream Mint Paste 75g (2.6 oz) spearmint leaf lollies Buttercream 65g (2.3 oz) milk Freckles Crunch 120g (4.2oz) dark chocolate Bananas Joconde Banana Syrup 75g (2.6 oz) banana lollies Almond Joconde 125g (4.4 oz) almond meal Redskin Glaze |
| Method |
Mandarin Jaffa Ganache
Musk Mallow
Spearmint Leaves Buttercream Mint Paste
Buttercream
Freckles Crunch
Bananas Joconde Banana Syrup
Almond Joconde
Assembling the cake
Redskin Glaze
|


Blimey that’s one hell of a cake and what an endeavour, I might have to follow your lead and attempt a Great British Bake Off recipe now! How long did it take?
Hard to say specifically since I made some of the ingredients and was making two other cakes at the same time (and taking photos slows me down). But all up I did it over 4 days. A lot of the time is waiting for the layers to set — oh to have the luxury of a blast chiller as in the MasterChef kitchen. On MasterChef they did it in 3 hours.
What an amazing and beautiful cake! I would love to try it, but will have to make those substitutions you spoke of. I like its name, too.
Thanks! I’m sure you can end up with a very similar product using the substitiutions
Simply amazing! Well done 😀
It looks so pretty and oh so tooth-achingly sweet!
Thank you! It definitely is – the kind of cake you want a small piece of.
Very impressed by this cake. Especially how straight all the layers were. The photo of the banana lollies cooking looks very appetising,
Haha, I knew you’d all but cry after they got dissolved.
Wow! I am thoroughly impressed! The time and love that went into this… kudos!
Thank you!
Lady, you are simple THE GREATEST!
You are most kind! ♥
It looks like diabetes and one heck of a toothache on a plate XD But it’d be so worth it. I’d make this if I could, but the US doesn’t have anything like what you had.
The easiest way is probably to import stuff, or hit up a store that sells foreign candy.
Holy Sh… that’s amazing!
Thank you! 😀
Hi, Thanks so much for this, looks much more approachable than the official masterchef recipe. I shall be giving it a go soon for the wife’s birthday (well a modified version as she doesnt eat bananas (replacing with raspberry shrimp sweets) and only using white chocolate). Couple of questions though, if you’ve got a minute.
Im in the UK and im not sure what the Murray River pink salt is. is it normal table salt or a sweetened variety of some kind?
I, like you, will not be buying 7 different cake tins, will probably be working with 2 or 3. So when one layer is set, you mention removing it from the tin and transfering it to a air tight container. Does this mean you ended up with several containers in the freezer or did you assemble the layers as they were set? Did you line the containers or, as they are set, do they need lining?
Many thanks for your time
Dan
Yay, I’m so excited for you! Raspberry sounds like an amazing substitute.
Pink salt is just salt that comes from different mineral deposits. There’s a few different types. Murray river is supposed to be more common here, though I seem to come across Himalayan pink salt more often. I can’t really distinguish between the taste of the pink salt and the regular sea salt I usually use. There is supposedly a difference there (pink salt is apparently more flavourful) but I imagine you’d have to have quite a refined palate to taste it. The difference is mainly textural. Different salts perform slightly different in dishes. Pink salt is also apparently better for you due to the trace elements it contains. If you can’t get a hold of pink salt, or want to cut costs, just use regular sea, or even rock, salt. I doubt very much you’ll detect a difference.
For freezing, I had the luxury of a lot of freezer space. I kept two containers in the freezer: one big enough for the springform tin to sit flat in while the layer froze, and a larger container I later moved the layer to to store later. When I removed a layer from the cake tin I left it attached to the plastic that was lining the tin. I then covered it in plastic wrap, or another layer of plastic, and moved it to the larger container. So I had the layers eventually stacked atop each other inside one container, but separated by plastic. Some layers don’t really need lining as they set rock hard (e.g. the buttercream) but I did it anyway.
The only layer I assembled as I went was the jaffa ganache layer. I found it was still a little tacky after freezing and didn’t want to cover it with more plastic for that reason. So I attached that one to the freckles layer after it had frozen, then stored the two together. You could attach it as you go.
I hope that clarifies it – let me know if anything I said isn’t clear.
Hi,
Thanks so much for your reply, that’s really helpful. I think ill not worry too much about hte pink salt, if i come across any, then great, but if not, im sure i wont notice the difference. I’ve also found a website that sells australian sweets, so that’s most helpful.
The only follow up quesaiton i had was about the plastic that you line the tin with. i had assumed that you meant plastic wrap (or climg film) but i dont think that is what you meant. What kind of plastic did you use to line the tins and keep the layers seperate in teh freezer?
I used a combination of plastic pockets which I cut the seams off of (for the base) and acetate (for the sides) when lining the tin. Bernard Chu uses go-between for his recipe but I had no idea where to get it from and honestly couldn’t be bothered searching, so I improvised. You can use plastic wrap/cling film if you want. The only downside is that it’s hard to get it perfectly flat so you might end up with creases in your layers. You could also use baking paper but it will probably go a little soggy.
To keep them separate, I used a combination of the plastic pocket or plastic wrap. Whatever was on hand basically.
And now it makes sense. it didnt seem right to try with the film, as i knew it would drive me crazy trying to get it straight and flat. Acetate it will be.
Thanks (and loving the blog)
Yeah, I have no idea how people use it for terrines and things like that. It drives me insane trying to get it flat.
Best of luck with it all! I’d love to hear all about it when you’re done!
Hi!
I Love your page! It’s amazing and has given me so much inspiration.
I came across your page as I’ve been prepping for the past week and a half to make the lolly bag cake and have been searching mindlessly for ONE last ingredient which will most likely not be complicated at all! Well, I was searching until I saw your page and have been on here for about 2 hours now looking through all of your wonderful creations.
I’m also from the UK and have ordered a lot of things and will be making some of the ingredients for the lolly bag cake but can’t for the life of me find food grade natural eucalyptus flavouring oil?? Am I missing something and does this oil have a different name?
Your help would be so much appreciated :).
Hi Natalie,
Euc oil is really hard to find, and what is around is confusing. My understanding is that Blue Gum Oil (Eucalyptus globulus) is approved to be food safe. The cineole-based oils are used in flavouring both commercially and otherwise and are safe, but only at very small concentrations..
Online it’s difficult to find sold singly (I found lots of places that were happy to sell it to you in 25 kilo lots!). If you can’t find it I would recommend just using peppermint essence/oil. It basically does the same thing. And it’s also a good way to cut costs on what is a very expensive ingredient list.
Thank you also for your lovely words!
Thank you so much :D! Peppermint essence/oil it is! Yay!
Hi,
I am using mckenzies gelatine leaves (white edible gelatine). I couldn’t find gold gelatine leaves. It is 12 leaves with a total of 20g. How much should I use? Your help would be appreciated. Thanks a lot.
It’s really impossible to say. There is unfortunately no universal standard among the different grades of leaves. Your best bet is to work out the volume of the layer you are trying to set, then choosing the amount of leaves from there. From memory one whole pack of the mckenzies gelatine sets 1 litre of liquid.
Shirley, I found the following information on gelatine leaves on The Essential Ingredient’s website:
One leaf gold strength gelatine is equal to 2.2g powdered gelatine. One leaf titanium strength gelatine is equal to 5g powdered gelatine.
Hope that helps. (I’ll be making this cake this week – heatwave permitting 🙂
Ang
Pingback: Joconde Imprime with Chocolate, Hazelnut and Raspberry Entremet | Cakecrumbs
Hi, thanks for the great post it looks amazing and I’m going to try it for my friend’s son this week. I am a bit time-poor this week and will use peppermint and orange essence instead of the mandarin concentrate and euc oil. Any tips on how much of the essence to use as substitutes? Thanks 🙂
It always varies from brand to brand. For the peppermint/euc oil substitute you could probably sub 1:1 as long as the peppermint oil wasn’t really concentrated. But mostly I’d recommend doing it to taste: add a little, taste, then add more if you need. For the peppermint, you want to add enough so that it really starts to bring out the flavour in the buttercream. You’ll notice a huge difference before and after: before it will be buttercream that faintly tastes like the spearmint leaves, and after adding a little it will taste completely like the lollies.
For the jaffa ganache you just want that subtle flavour of orange coming through, so don’t keep adding until it tastes completely like orange, you want to maintain that balance.
Thanks for this recipe, I’ve used it three times so far and has always been a hit! So time consuming but the fact that you can do it over a few days and freeze most of the layers certainly helps.
Just made this cake…twice…..what a process! I used your hints and made the 4 ingredients that were hard to find but I also coated a $2 bag of popping candy in some chocolate which did the trick. The first round I used eucalyptus oil which I found unpleasant but the second time used spearmint oil which seemed to flavour the buttercream with a more appealing flavour. My ganache also stuck to everything in the first try but I found some Go-between in Woolies (readily available next to the cling wrap) and it still stuck but not so much. The first try, I made the layers in a cake tin but found I couldn’t regulate the thickness of the layers so the second time round, purchased 2 cookie trays and lined then with canola spray and then the plastic sheets as it was then easy to pop the layer in and run a ruler over it so it came out more even. Thanks so much for your original post, was very, very valuable.
Hi, it’s really hard to find ingredients in italy 😀
Two question: “hundred and thousand” are soft? Here they’re hard and so there’re really “dangerous” 😦
The translation is a problem too: I think that plain flour is our 00 flour (it’s for cake) but I really dont know what thickened cream is 😐
Can you help me? 🙂
Hi I was just wondering how long the cake can stay in the freezer? I want to make it on the weekend but my friends birthday is on Wednesday, do you think it would work?
I’m so happy I found your recipe!! Will be attempting this after my exams 🙂
A few questions I had- would it be okay to use gelatine powder instead of the gold gelatine leaves as long as I manage to work out the equivalent amounts? Also, how will the texture of the almond joconde be affected if I sifted the almond meal with icing sugar and flour instead of using a food processor? The last time I tried, I sifted it 3 times, but still was not very fine at all. I’m not sure if the problem lies with the strainer or the brand of the almond meal.
Any help will be appreciated thanks!!