
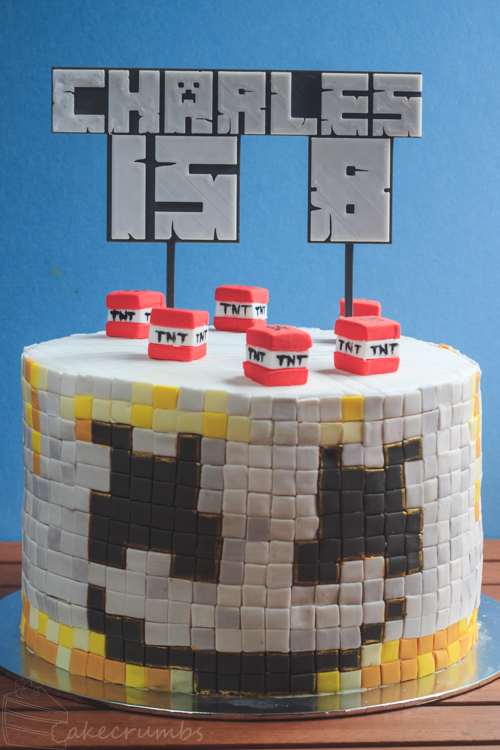
This week is a cake I made for a young boy celebrating his 8th birthday. The initial brief was for a replica of the cake on the cover of Marshmello’s Light It Up single. As we discussed it, though, their’s son’s love for Minecraft came up and I was asked to incorporate the TNT, and then some other Minecraft elements. It evolved into the original cake pixelated into the Minecraft style.
To compliment the cake I 3D modelled and printed a Minecraft cake topper. I’ve since made them available to purchase on my Etsy store. So if you need one customised for yourself or a loved one, pick it up here.
Inside the cake was a little different. It needed to be not only a rainbow banana cake, but dairy free and low sugar. It’s a request I get often enough when catering for young birthday parties due to an idea that all the sugary foods send the kids a little hyper. [A little science trivia for you: it’s the excitement of the event that sends the little ones so loopy. Both sugar and food colouring have no effect on hyperactive behaviour!] It’s also steeped in concern for maintaining a healthier diet at a young age, too.
The issue when it comes to baking is that sugar is an important part of the leavening process in dry flour mixes. Simply cutting out the sugar can make for one flat cake! Combining that with dairy-free is a challenge, but one I’m used to. So for this one I adjusted my favourite vegan cake recipe to get the right results.
To make it work, I reduced the sugar by half and replaced the usual white sugar with raw sugar. I added in a couple of ripe mashed bananas and increased the amount of flour slightly to improve the leavening.

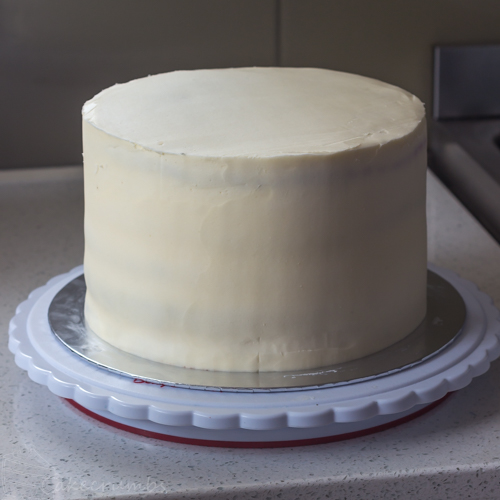
For the buttercream I used a combination of a plant-based butter and copha, similar to what Americans call vegetable shortening. It’s a popular butter substitute in buttercream, both as a stabiliser and often times as a cost-cutting substitute. I usually avoid it for that reason, but having a need to use it made stacking this cake a breeze. It sets really well at room temperature and doesn’t succumb to heat the way butter does.

It’s also really easy to get a crisp coating under the fondant with it.
Usually this is where I’d cover the cake but I decided to do it a bit different. I cut teeny little squares of fondant in all the colours I needed. To get the pattern I used a program I normally use for cross stitch patterns but the same principle applied here. I simply measured the cake as a canvas, chose the resolution and let it do the work.

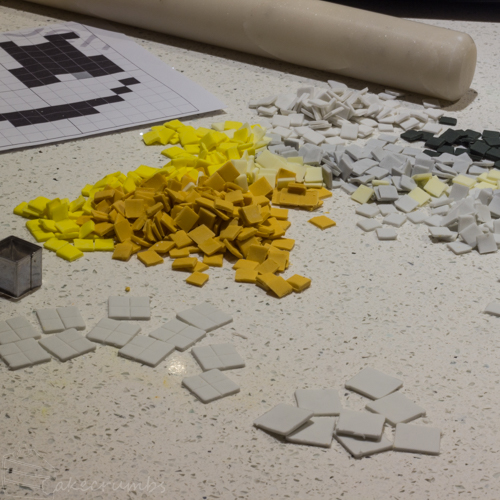
I thought this would be a quick little process, but this took several hours. I spent most of the afternoon cutting the squares, then into the early hours of the morning applying them to the cake.

As was originally requested I made a bunch of the Minecraft TNTs to adorn the top of the cake alongside the custom cake topper.

The end result was something much different to the starting idea, but very unique to the birthday boy. He and his mum were thrilled, and that made all those hours worth it.

Here’s the recipe for the not just dairy-free but also incidentally vegan rainbow cake.
Do note that if you are going to make this for a strict vegan recipient to be careful about the food colouring. Red food colouring in particular is often contains carmine, a product that is derived from the cochineal insect. Carmine is perfectly “natural” and may still be found in brands that declare their food colouring to be so, so don’t assume “natural” means plant-derived. Some vegans don’t avoid products from animals without a central nervous system, and others will refuse anything that has an insect component. Always ask if you are making it for someone else who is vegan, or just assume cochineal is off the table.
Dairy Free Rainbow Cake
For those times you need a rainbow cake for a special dietary requirement
Ingredients
Rainbow Banana Cake• 1 1/4 (220g) cups plain flour
• 1 cup (220g) raw sugar
• 2 ripe bananas, mashed
• 1/2 tsp salt
• 1 tsp bicarbonate soda
• 1/3 cup (80ml) vegetable oil
• 1 cup (250ml) tepid water
• 1 tsp apple cider vinegar
• 1 tsp vanilla essence
• rainbow food colouring
Dairy-free Buttercream
• 250g copha (vegetable shortneing), room temperature
• 250g plant-based butter
• 1kg icing sugar
• 1tsp vanilla essence
Directions
-
Rainbow Banana Cake
- Preheat oven to 180°C (160°C fan-forced/350°F). Grease or line a circular cake tin (approx 20cm) with making paper. Line more if you have them!
- In a medium saucepan, combine the butter and brown sugar. Stir over low heat until butter has melted and sugar has dissolved, then bring to the boil. Reduce heat back to low and cook for 5 minutes, or until mixture thickens slightly. Set aside to cool.
- Sift all the dry ingredients together in a bowl. In a separate bowl or jug, mix together the wet ingredients.
- Make a well in the centre of the dry ingredients and pour in the wet. Whisk the flour mixture in until well combined and there are no lumps in the batter
- Divide the batter into 6 individual bowls. Dye each portion of the batter one of the colours (red, orange, yellow, green, blue, purple).
- Pour one of the coloured batters into the cake tin; bake for 25 minutes, or until the centre of the cake springs back when lightly touched.
- Repeat with remaining colours and set aside to cool.
- Pineapple Buttercream
- In a large mixing bowl, beat the copha and plant-based butter together with the vanilla at medium speed until mixture is light and fluffy. The copha takes quite a bit longer than butter to become incorporated so check for lumps.
- Add the icing sugar a little at a time and beat on low until combined, then continue beating at medium speed until the mixture is light and creamy (approx 8-10 minutes)


So good to read your blog again! I have an 8y.o. Great grandson’s birthday in March..BUT I’m in Qld and he is in Tassie, so his mum will have to try emulate your skills.
Always appreciate your very kind comments. ♥ I’m sure his cake will be fab!